To access the charging view in the vehicle's center display, tap  and then Charging. The charging view in the center display is also activated when charging begins.
Important
Setting a charging limit
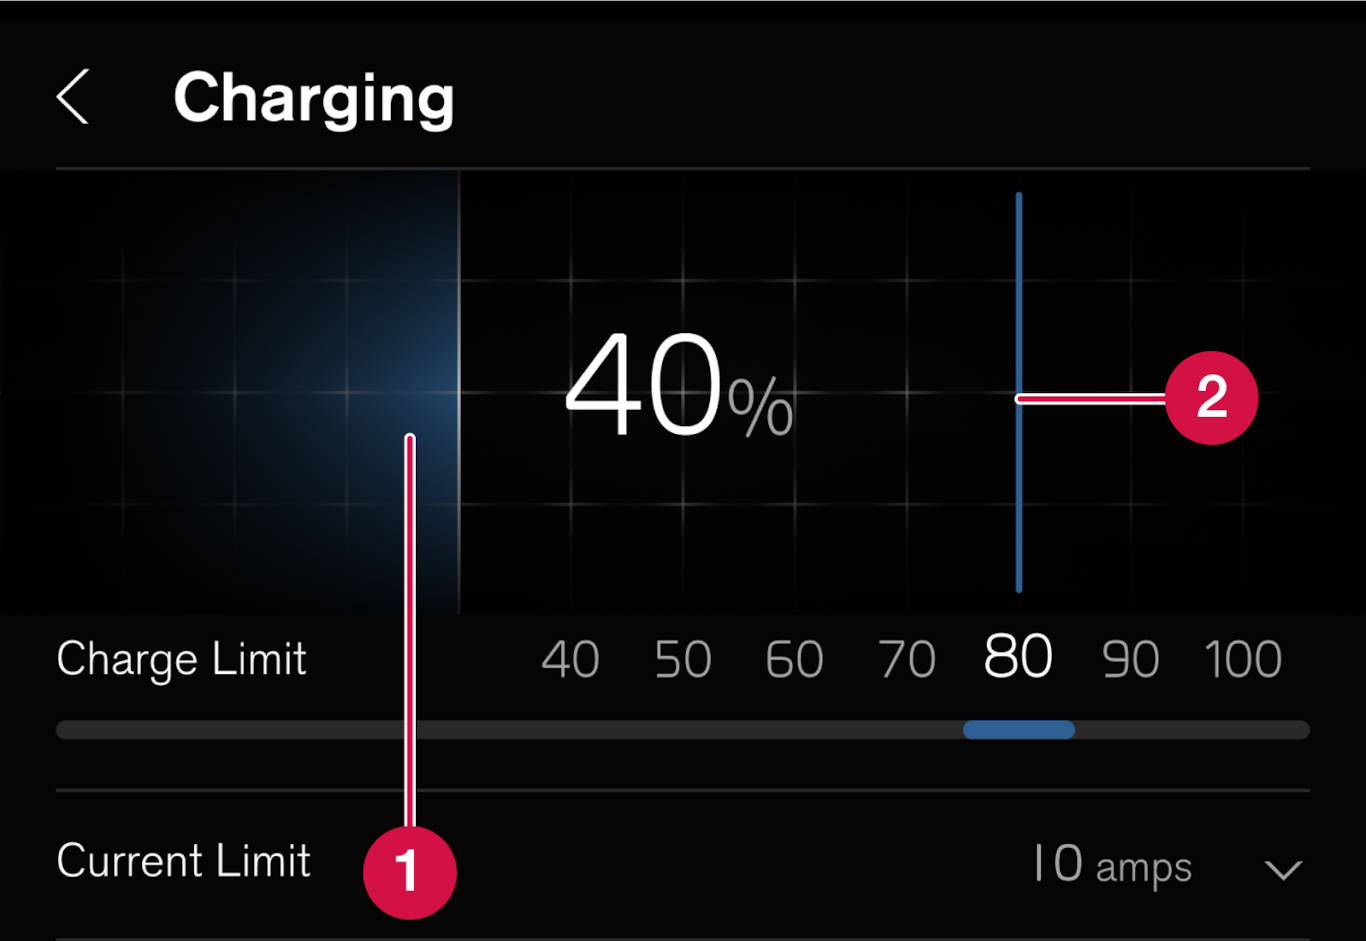
 The battery's current charge level.
 Charging limit – Swipe to set a charge level at which charging should stop. The set limit remains the same until it is changed again in the center display.
Important
Schedule charging
When charging using alternating current, it is possible to schedule and set start and stop times for charging. The scheduled charging will then be repeated automatically at the same time every day.
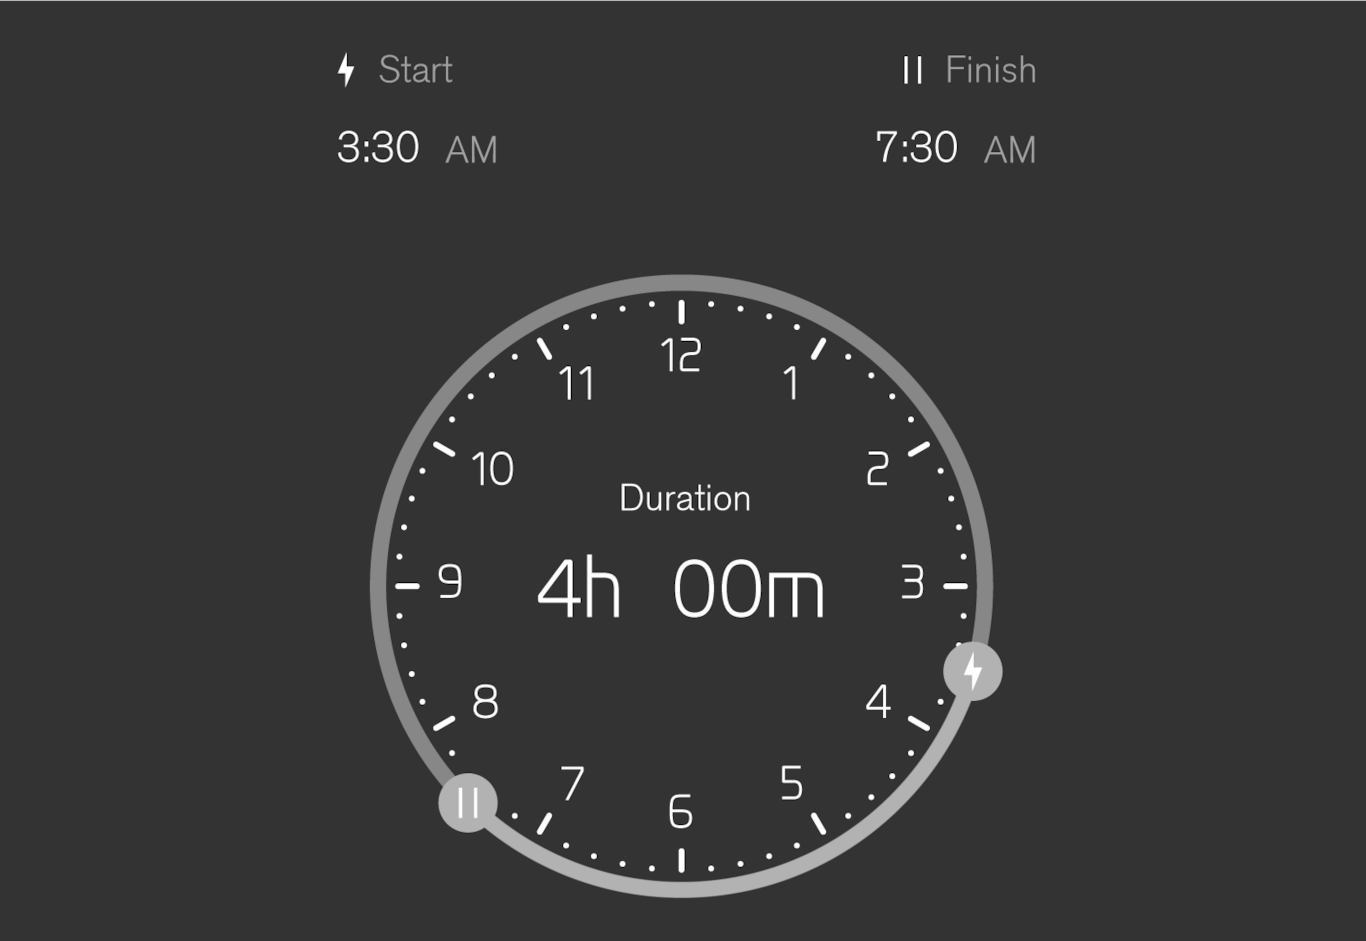
Select in the center display and then activate the scheduled charging in Schedule charging. Drag the  and
and  controls to set start and stop times for charging.
Deactivate scheduled charging using the control next to Schedule charging.
Note
Unlocking and locking the charging cable
Tap Unlock cable in the center display to unlock the charging cable and cancel charging. You can lock the cable into the charging socket by tapping Lock cable in the center display. When charging using a wall outlet/charging station (AC charging), charging will resume automatically. During rapid charging (DC charging), charging will not resume automatically.
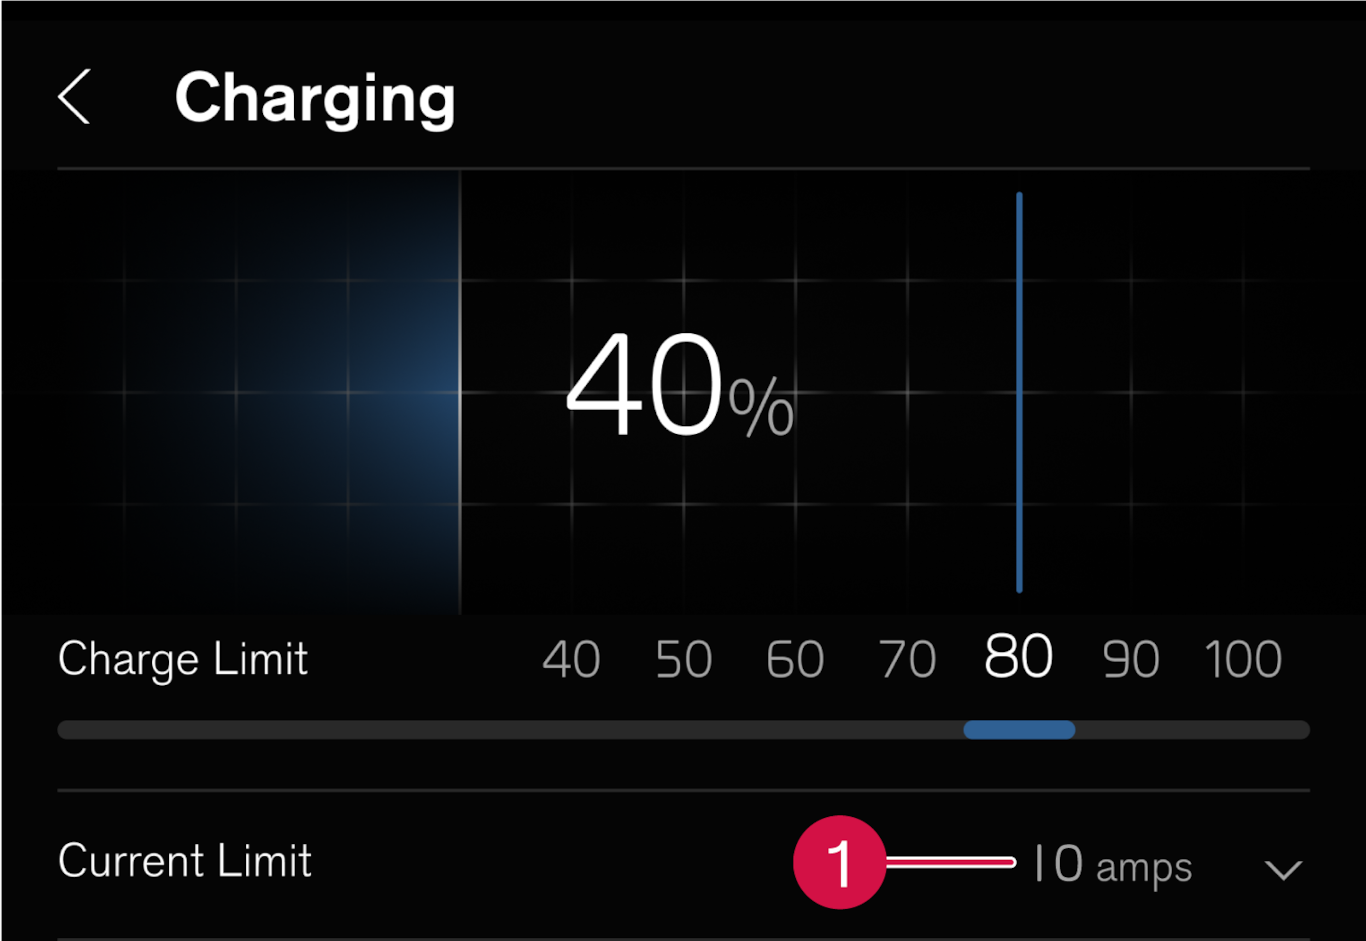
Setting amperage
- Set amperage.
When charging with alternating current1, it is possible to limit the maximum amperage the vehicle can be charged with.
Select Charging and the arrow next to Current limit (amps). Tap + to increase amperage or - to decrease amperage2.
For charging with more than one phase, the set amperage per phase is displayed in the instrument panel3.