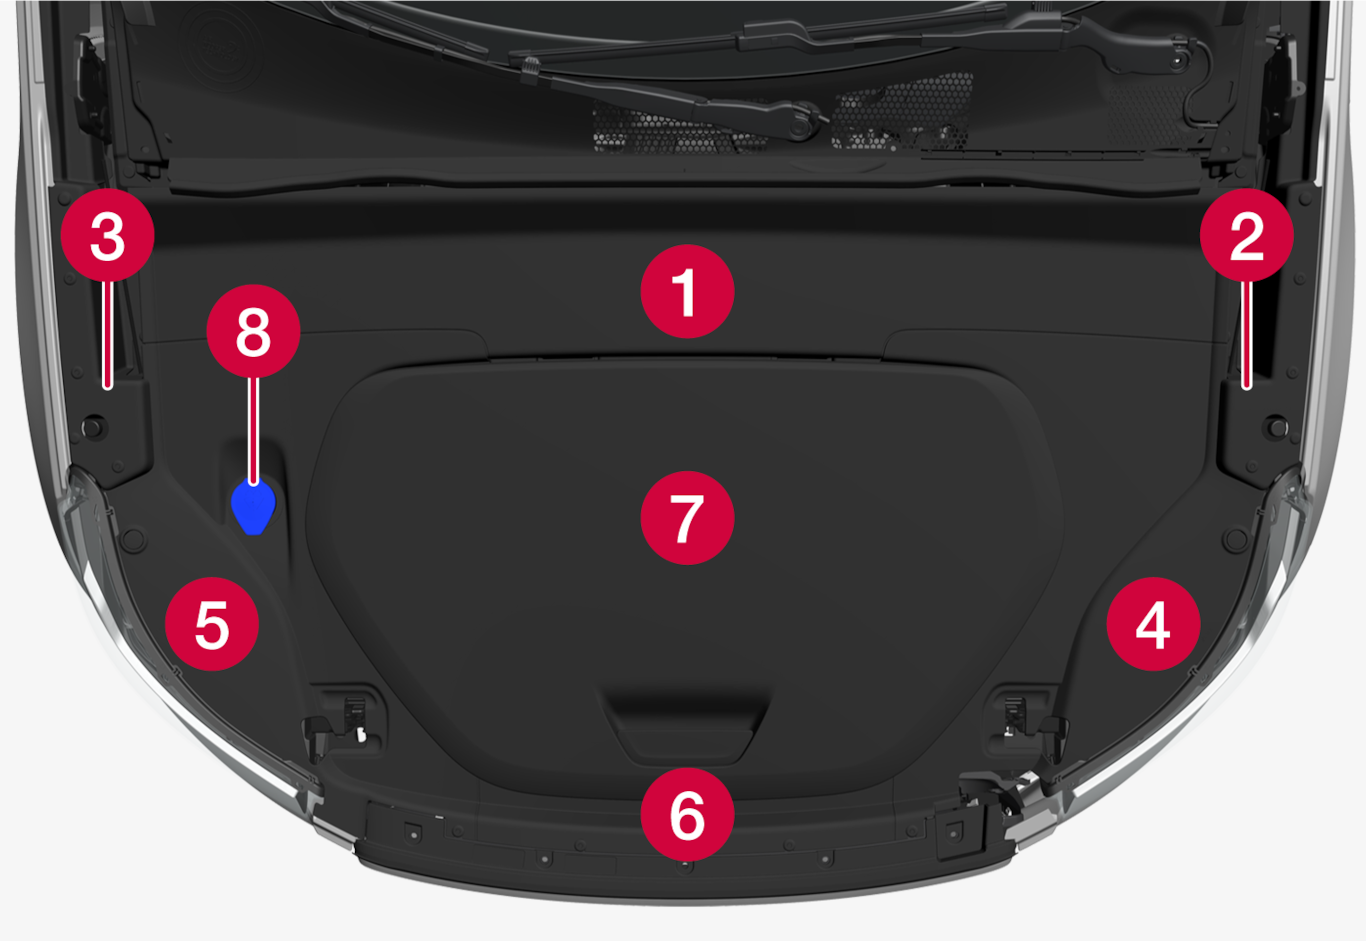
 Panel A – provides access to the negative charging point for jump-starting.
 Panel B
 Panel C
 Panel D – provides access to the positive charging point for jump-starting and to fuses under the hood.
 Panel E
 Panel F
 Cover for storage compartment under the hood
 Cap for filling washer fluid
Important
Important
Warning
The protective panels are held in place with plugs. To remove these plugs, use a screwdriver, pen or similar to press in the locking pin in the middle of the plug. When the pin is pressed in far enough, the plug can be pulled out. Avoid pushing the pin all the way through the plug, as this could cause it to dislodge and fall down between components. When reinstalling the panel, pull the locking pin out completely before reinserting the plug. When the plug is inserted in the attachment hole, push the pin into place again to secure the panel.
Because the protective panels overlap one another, they must be removed and installed in a certain order. To remove the panels, follow these steps:
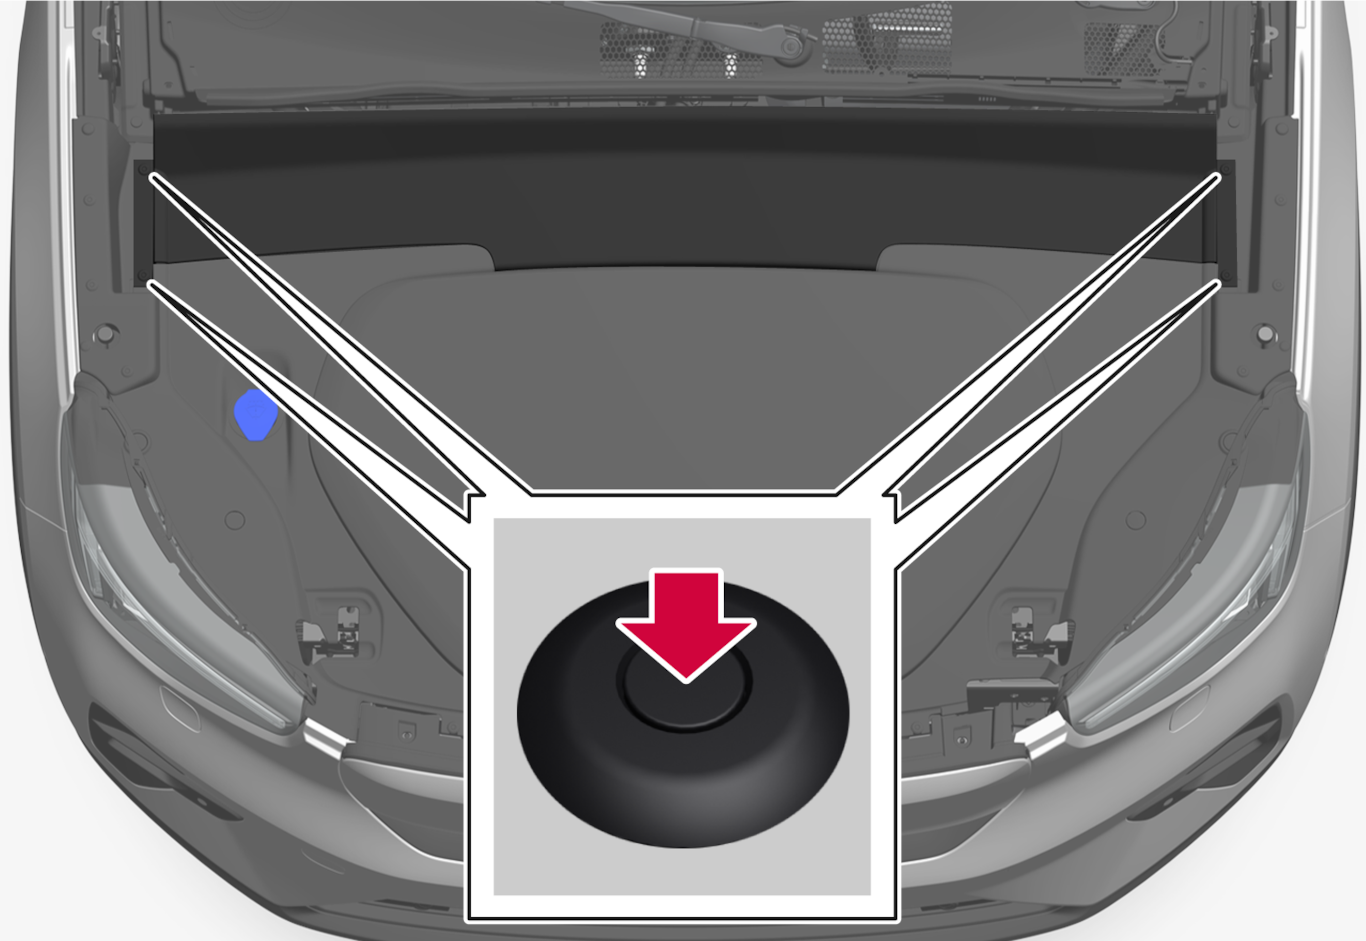
To replace the panel, pull out the locking pins completely and push them in again once the plugs are positioned in the attachment holes. Make sure that the snaps are positioned correctly before pushing the panel into place.
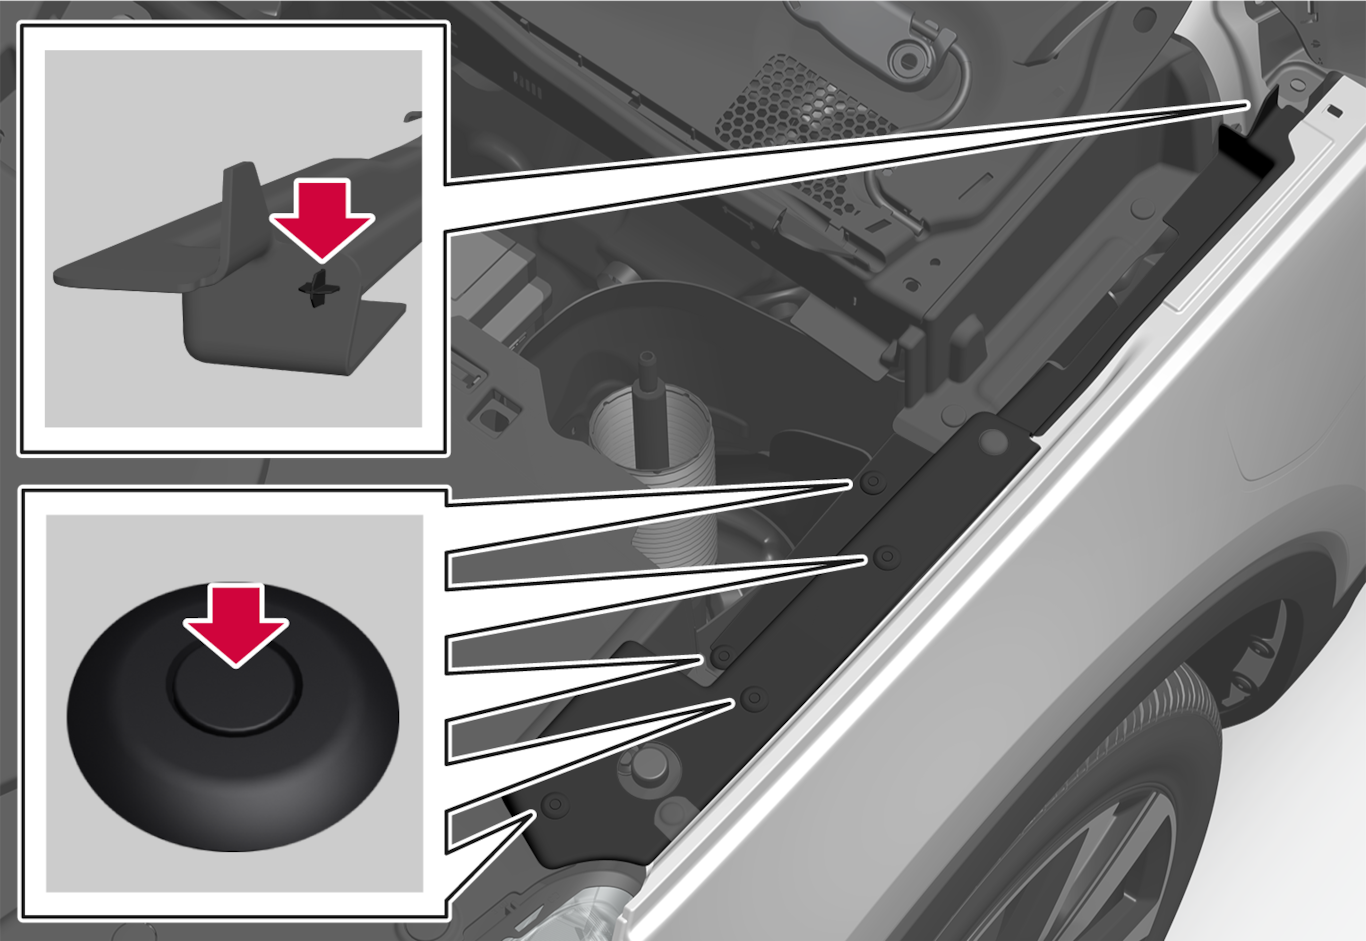
To replace the panel, pull out the locking pins completely and push them in again once the plugs are positioned in the attachment holes. The panel also has a protruding part at the rear that helps hold it in place as it is being positioned in its hole.
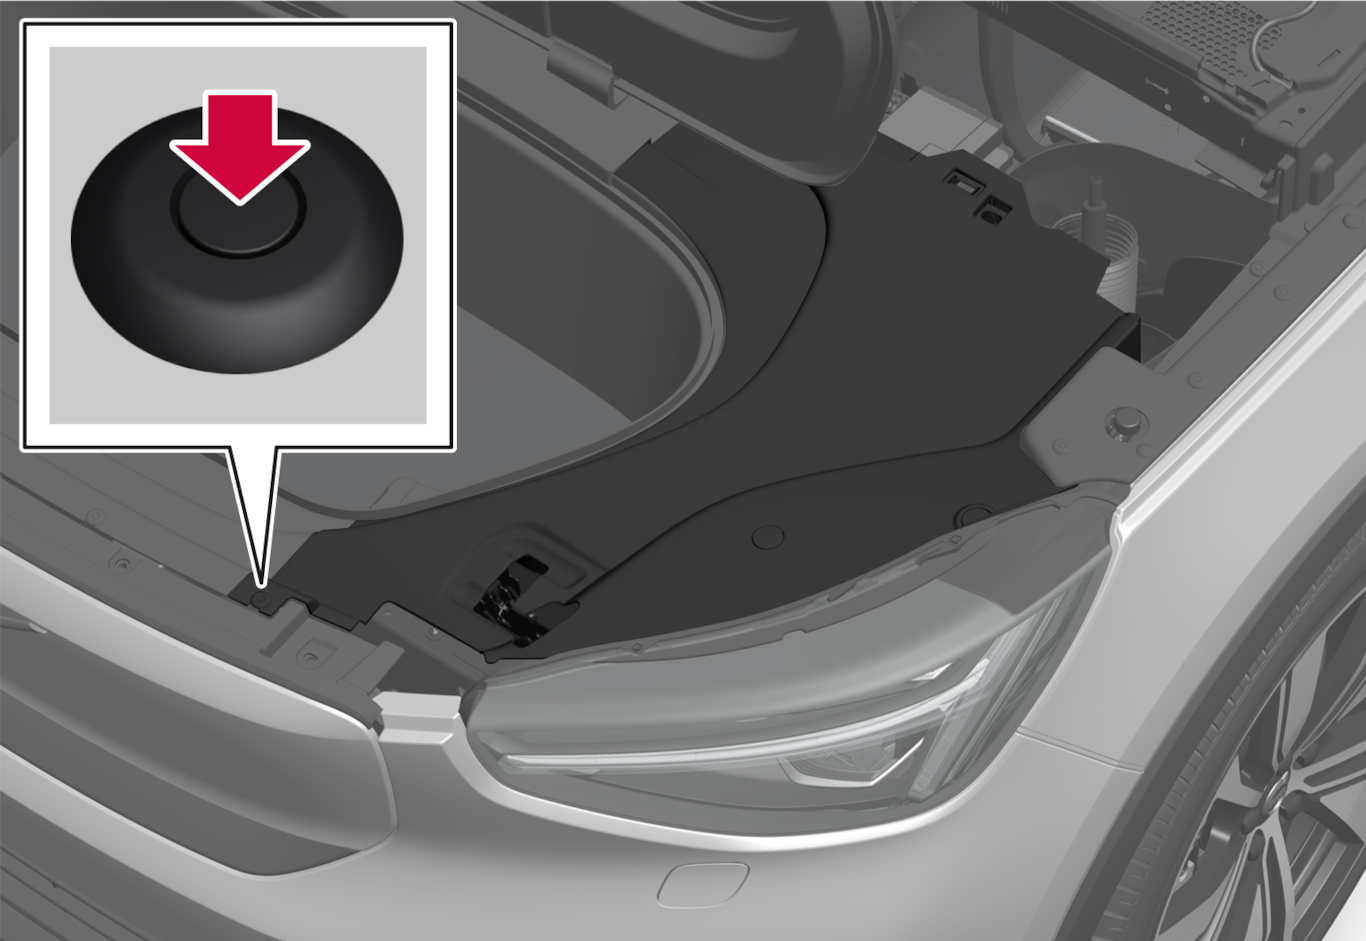
To replace the panel, pull out the locking pins completely and push them in again once the plugs are positioned in the attachment holes. Make sure that the snaps are positioned correctly before pushing the panel into place.
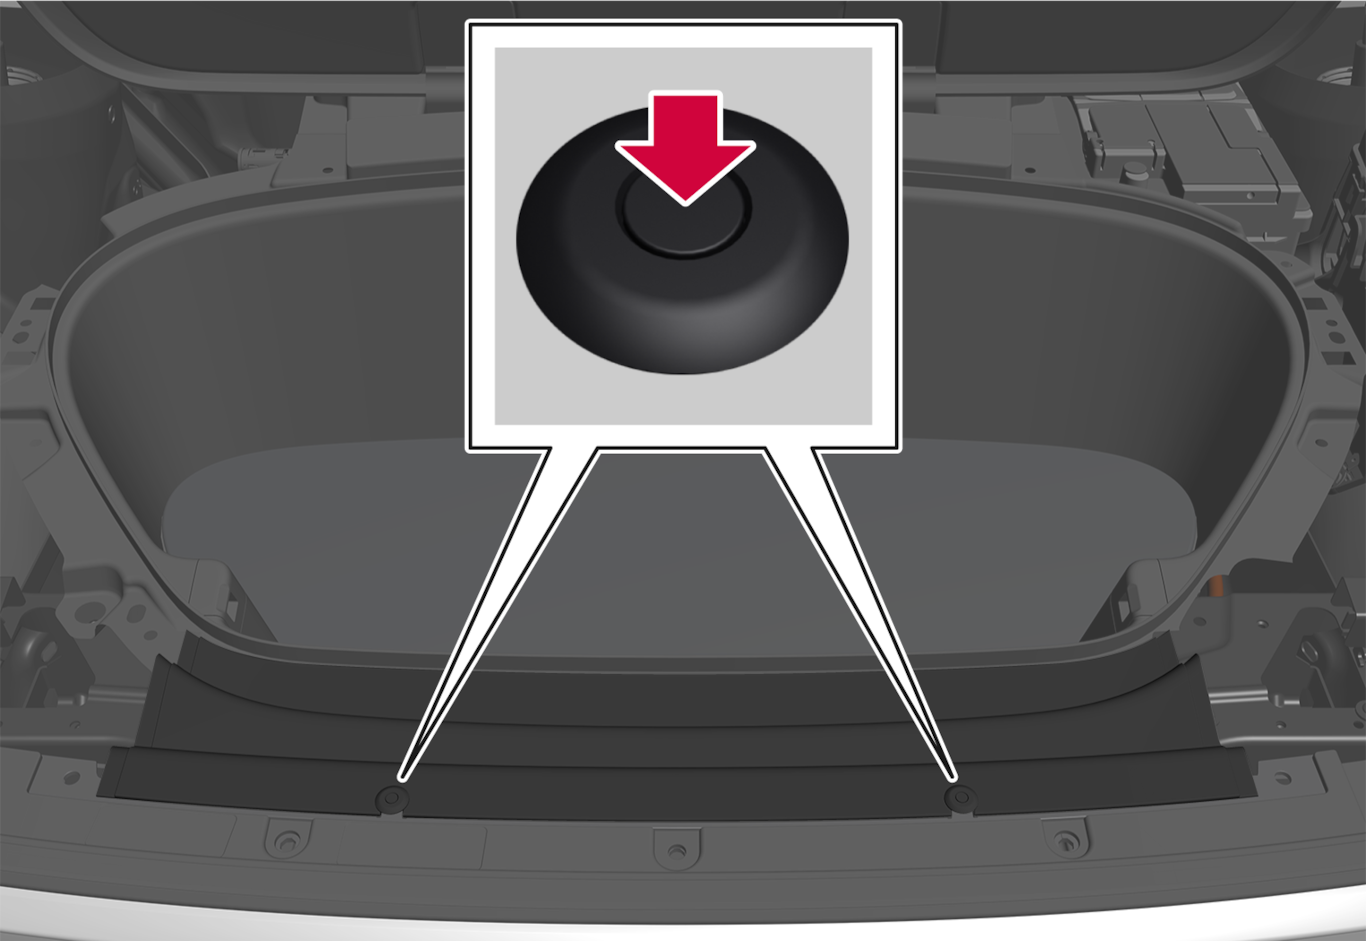
To replace the panel, pull out the locking pins completely and push them in again once the plugs are positioned in the attachment holes. Make sure that the snaps are positioned correctly before pushing the panel into place.