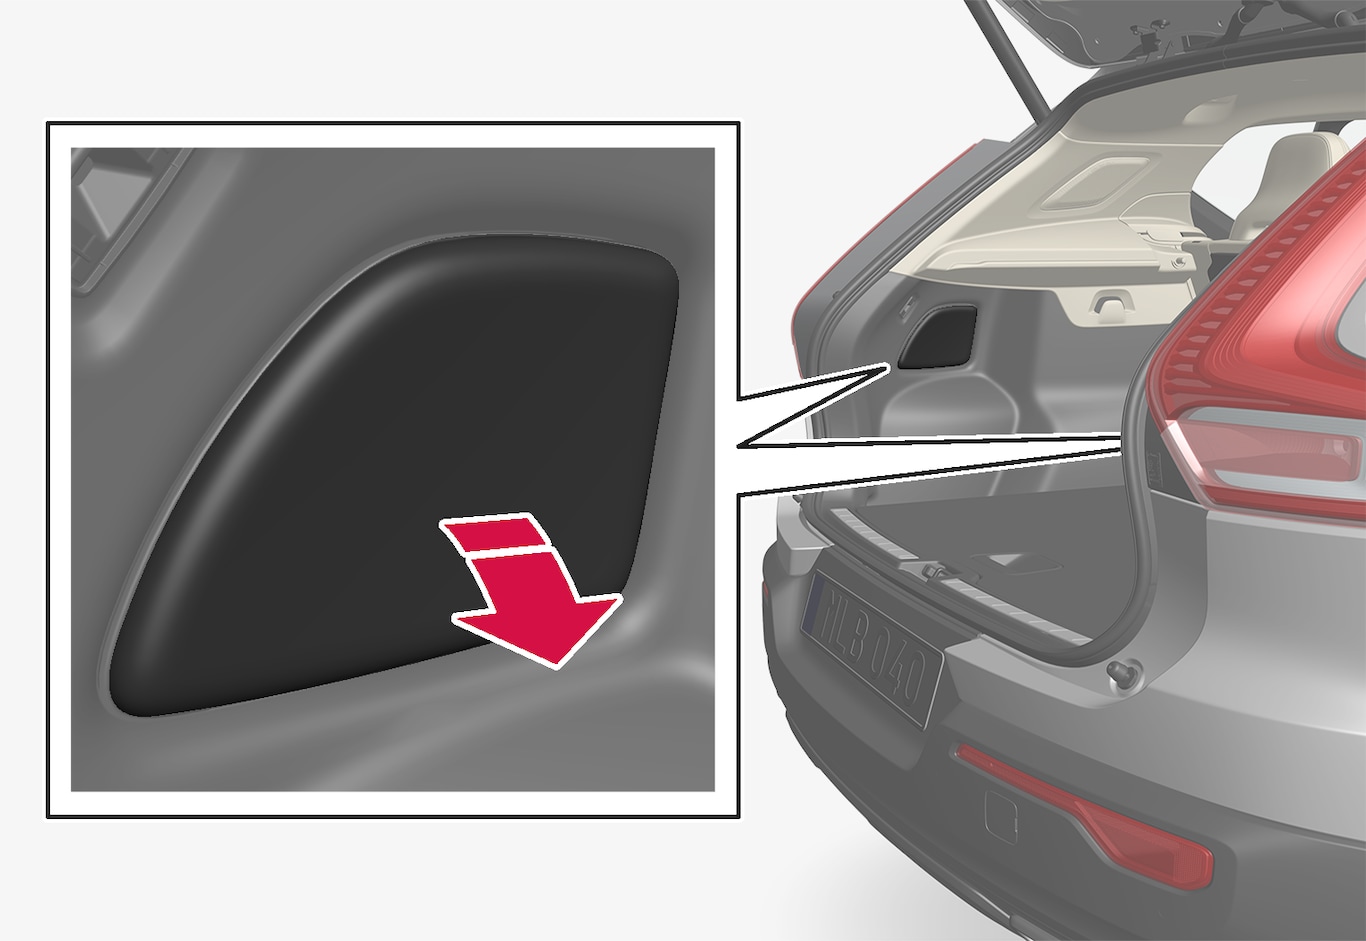
Press in the top edge of the panel cover to remove it.
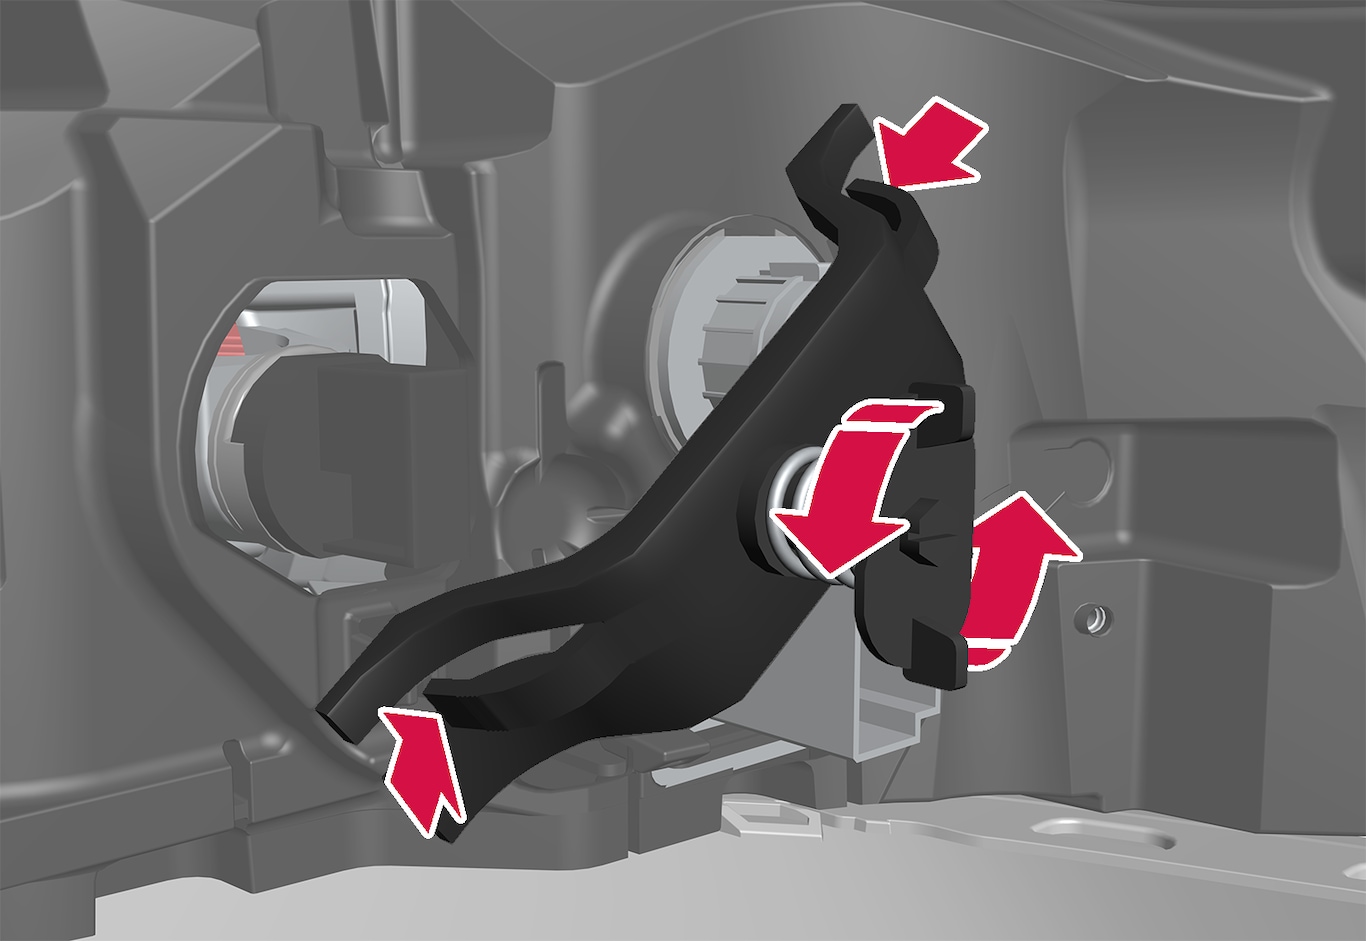
Move aside the insulation to access the support bridge.

Unscrew the spring screw by turning counterclockwise, press the clips into the sides and remove the support bridge. It is simplest to leave one screw in place in the support bridge.
Remove the gray bulb holder by turning it counterclockwise and pulling it out.
Remove the bulb by pressing it in and turning it counterclockwise.
Insert the new bulb by pressing it in and turning it clockwise.
Put the panel back in place and turn it clockwise.
Install the support bridge using the supplied spring screw and make sure that the clip is positioned correctly. Tighten the spring screw until it stops, max. 2 Nm (1.5 ft lbs).
Reposition the insulation, hook the panel and then press it back into place.
Important
Never touch the bulb glass with your bare fingers. Grease and oils from your fingers vaporize in the heat and will leave a deposit on the reflector, which may damage it.
Note
Exterior lighting such as headlights and taillights may develop temporary condensation on the inside of the lens. This is normal, and all exterior lighting is designed to resist this. Condensation is normally vented out of the lamp housing once the light has been lit for some period of time.