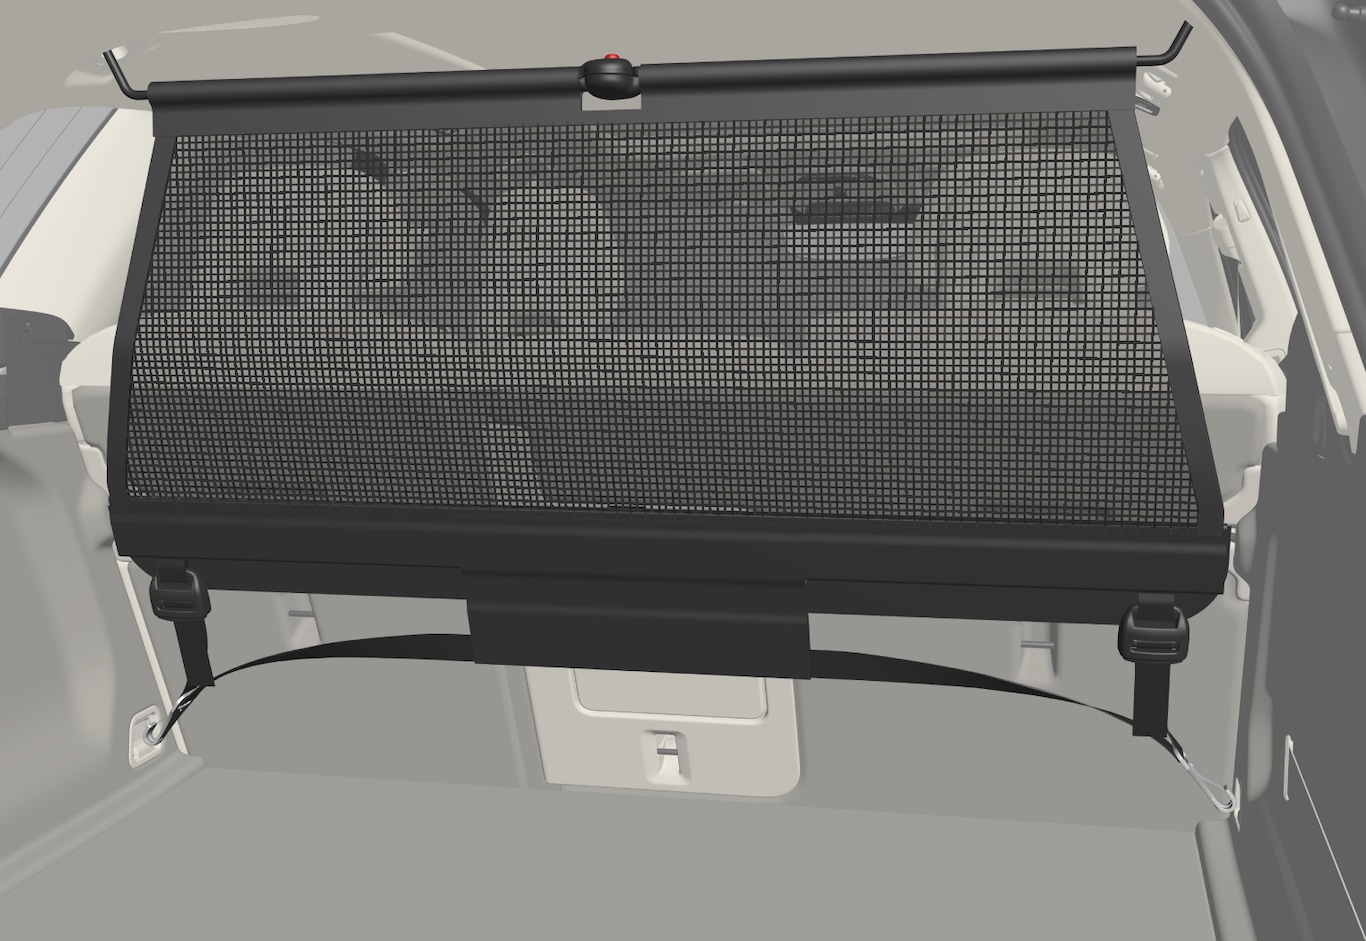
The cargo net is attached at four points.

For safety reasons, the cargo net must always be mounted and secured according to the following description.
The net is made of strong nylon weave and can be attached in two different locations in the vehicle:
- Rear mounting - behind the rear seats.
- Front mounting - behind the front seats.
Warning
Installing the cargo net
Warning
All of the cargo net's upper consoles, hooks and straps must be securely mounted and attached before the net is used.
Never use the net if it is damaged.
Note
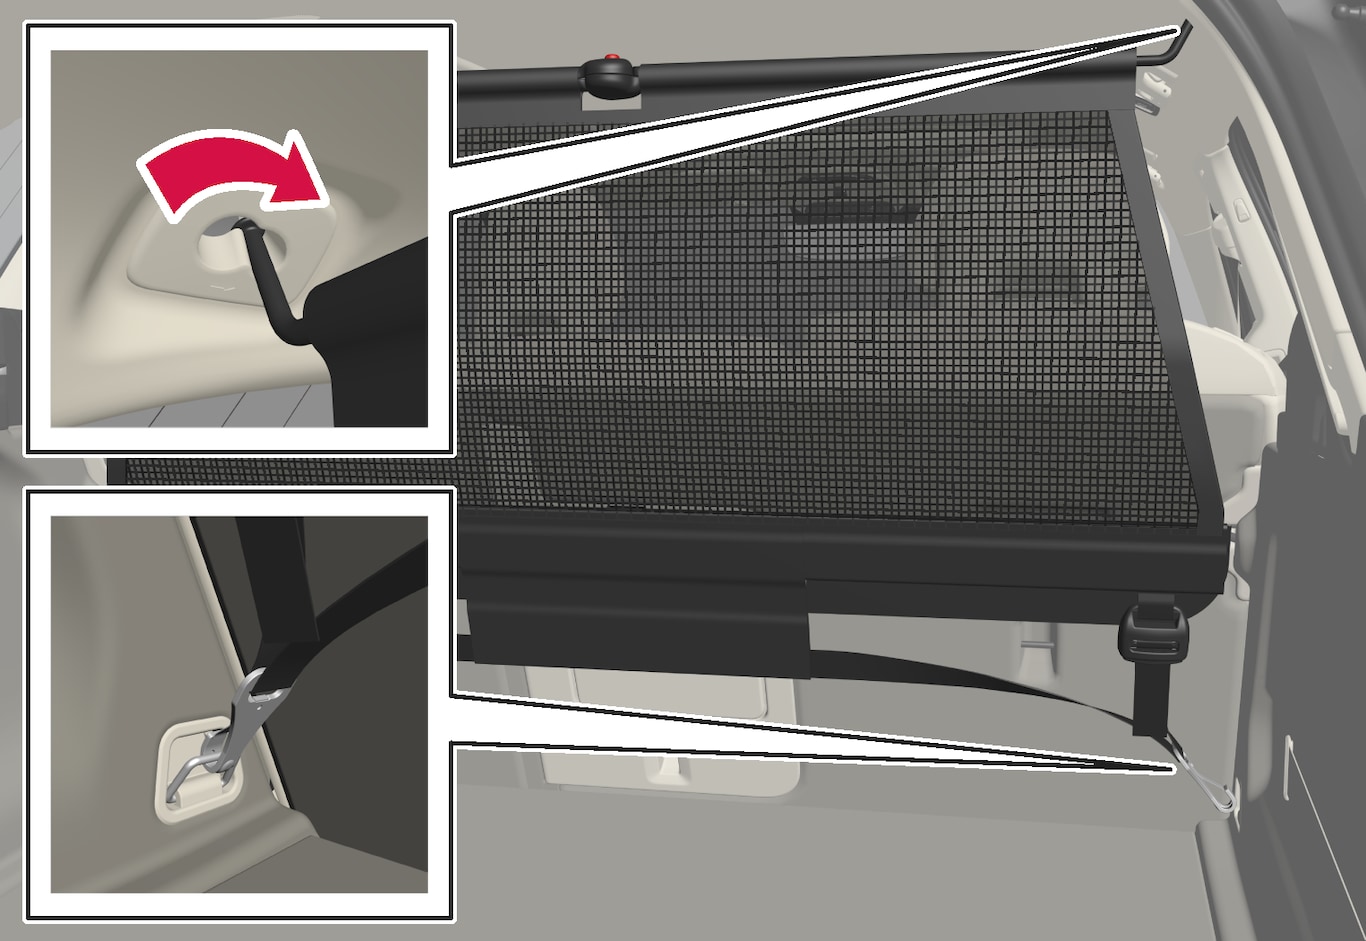
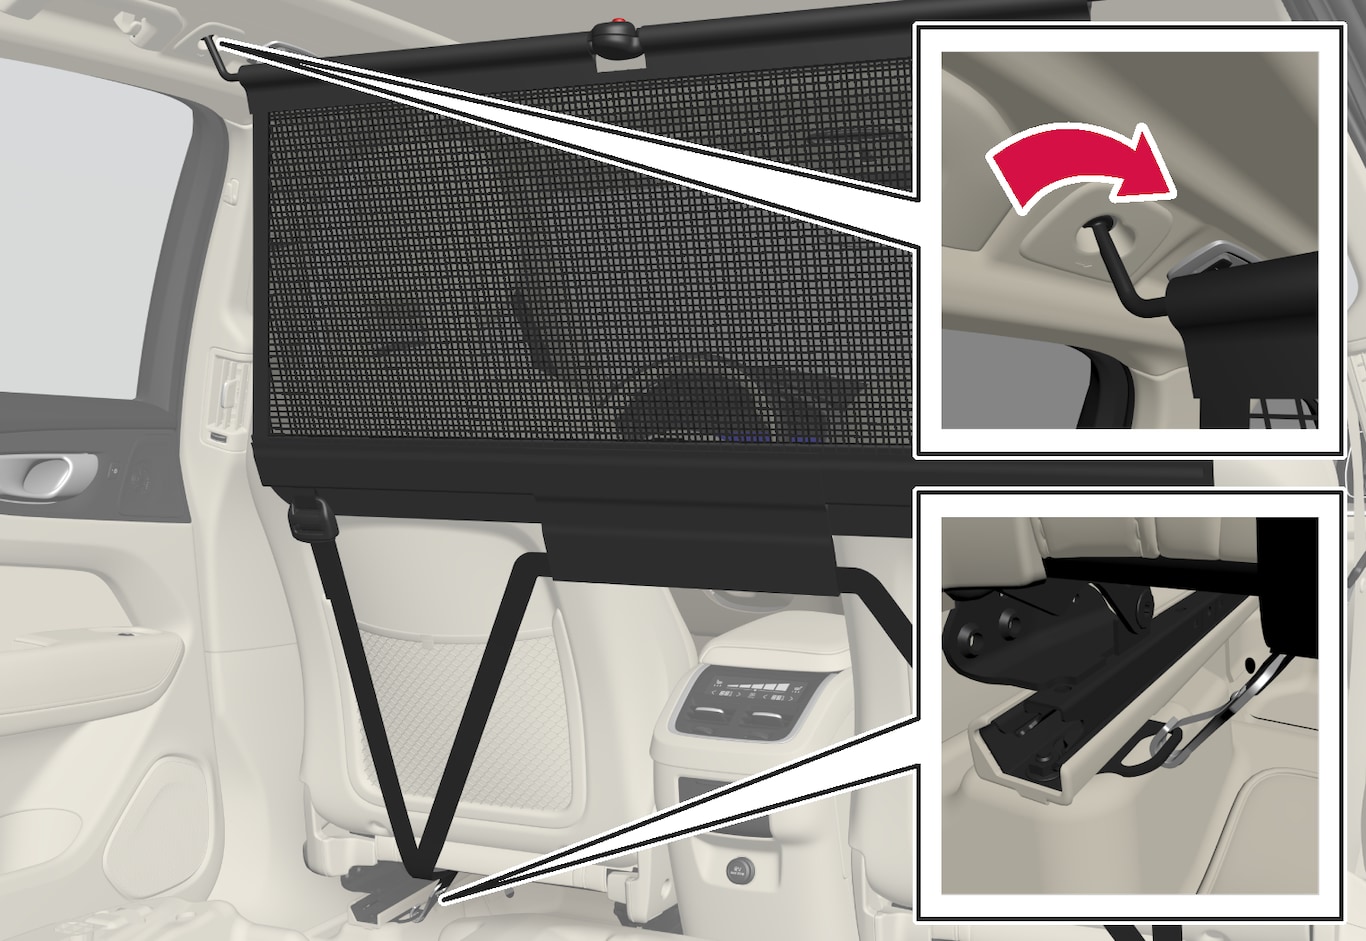
Insert one of the net's hooks into the front or rear ceiling mounting point with the strap lock facing you.
Remove any clothing hooks from the ceiling attachment by turning the hook a quarter-turn clockwise (left side) or a quarter-turn counterclockwise (right side).
Insert the net's other upper hook into the ceiling mounting point on the opposite side.
The telescopic spring-loaded hooks make mounting easier.
Make sure that the net's hooks are pushed forward as far as possible into their respective mounting points.

For rear mounting:
With the cargo net hooked into the rear ceiling mounting points, attach the net's straps into the front cargo anchoring eyelets in the cargo compartment.

For front mounting:
With the net mounted in the front ceiling mounting points, hook the straps into the outer eyelets on the front seat rails behind the seats. Attaching the net is easier if the seat backrests are upright and the seats are moved slightly forward.
When moving the seat and backrest back again, make sure to not apply too much pressure against the net. Move the seat or backrest only until it touches the net.