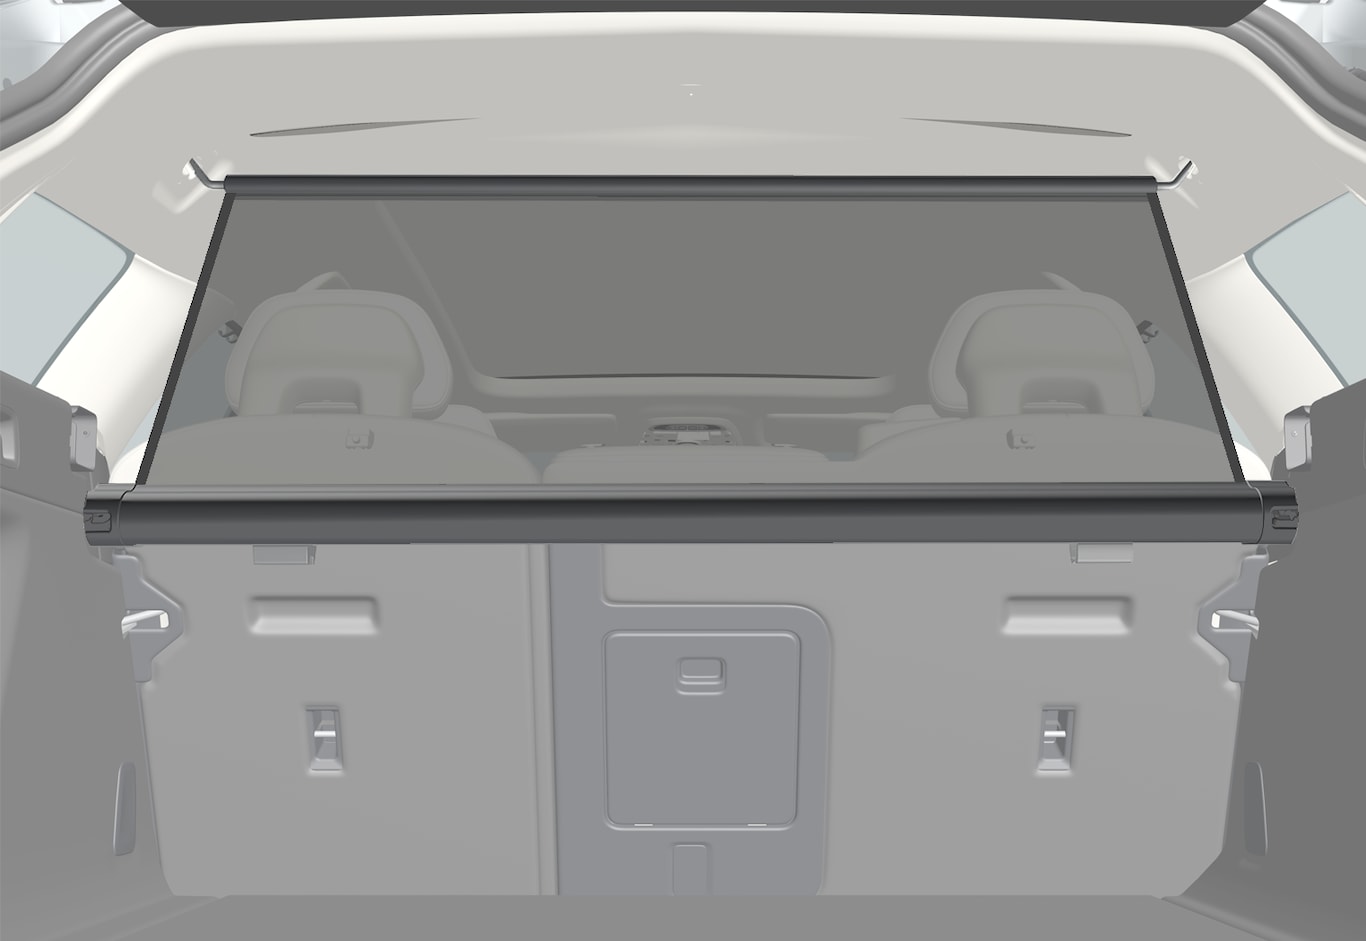
The cargo net is attached at four points.

For safety reasons, the cargo net must always be mounted and secured according to the following description.
The net is made of strong nylon weave and can be attached in two different locations in the vehicle:
- Rear mounting - behind the rear seats.
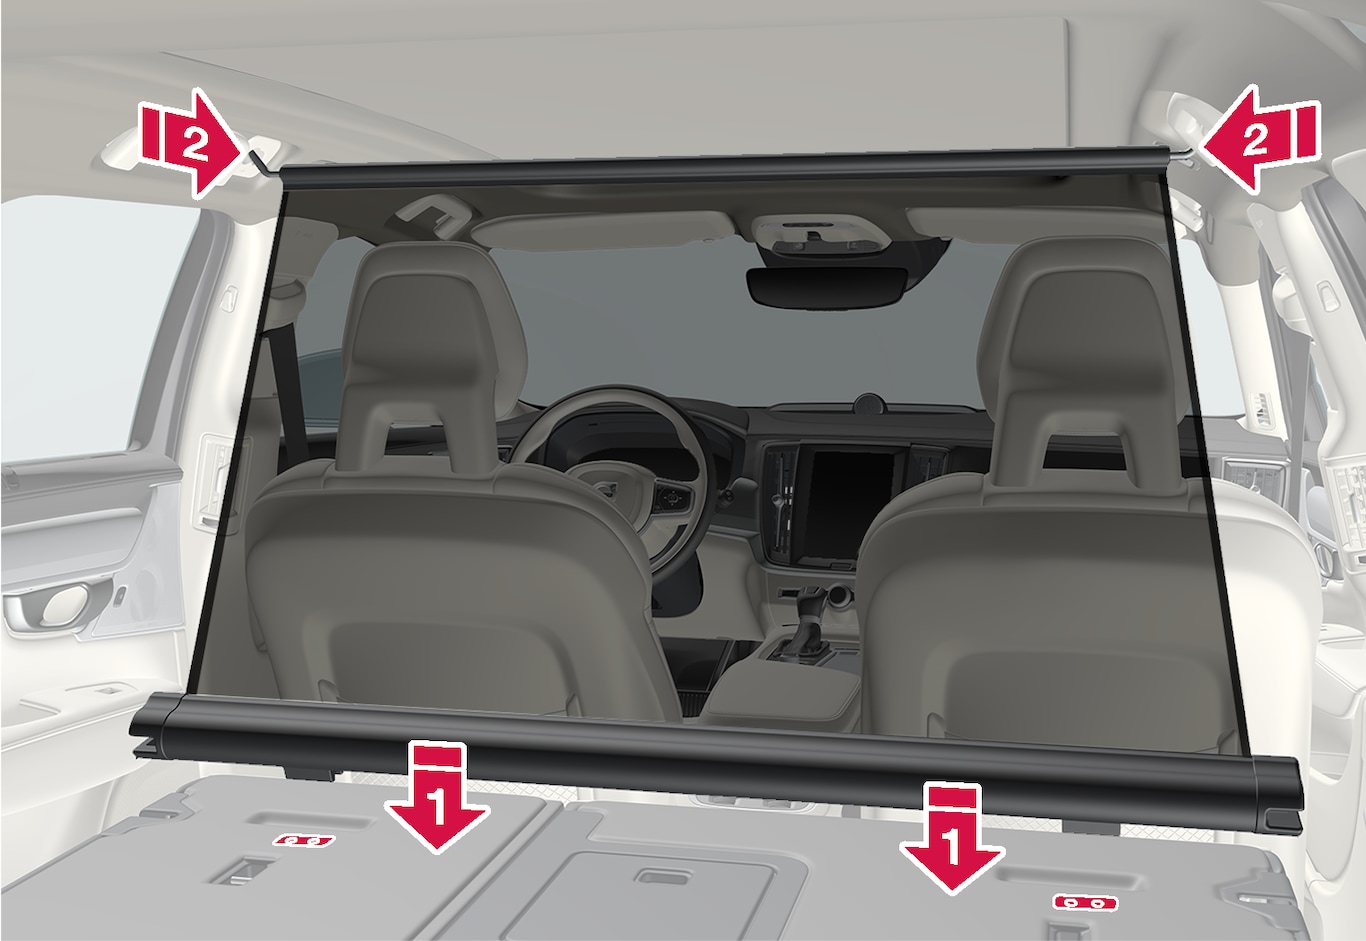
- Front mounting - behind the front seats.
Warning
Objects in the cargo compartment must always be securely anchored, even with a correctly installed cargo net.
Installing the cargo net
Rear mounting

Fold down the rear seat backrests to make mounting easier.
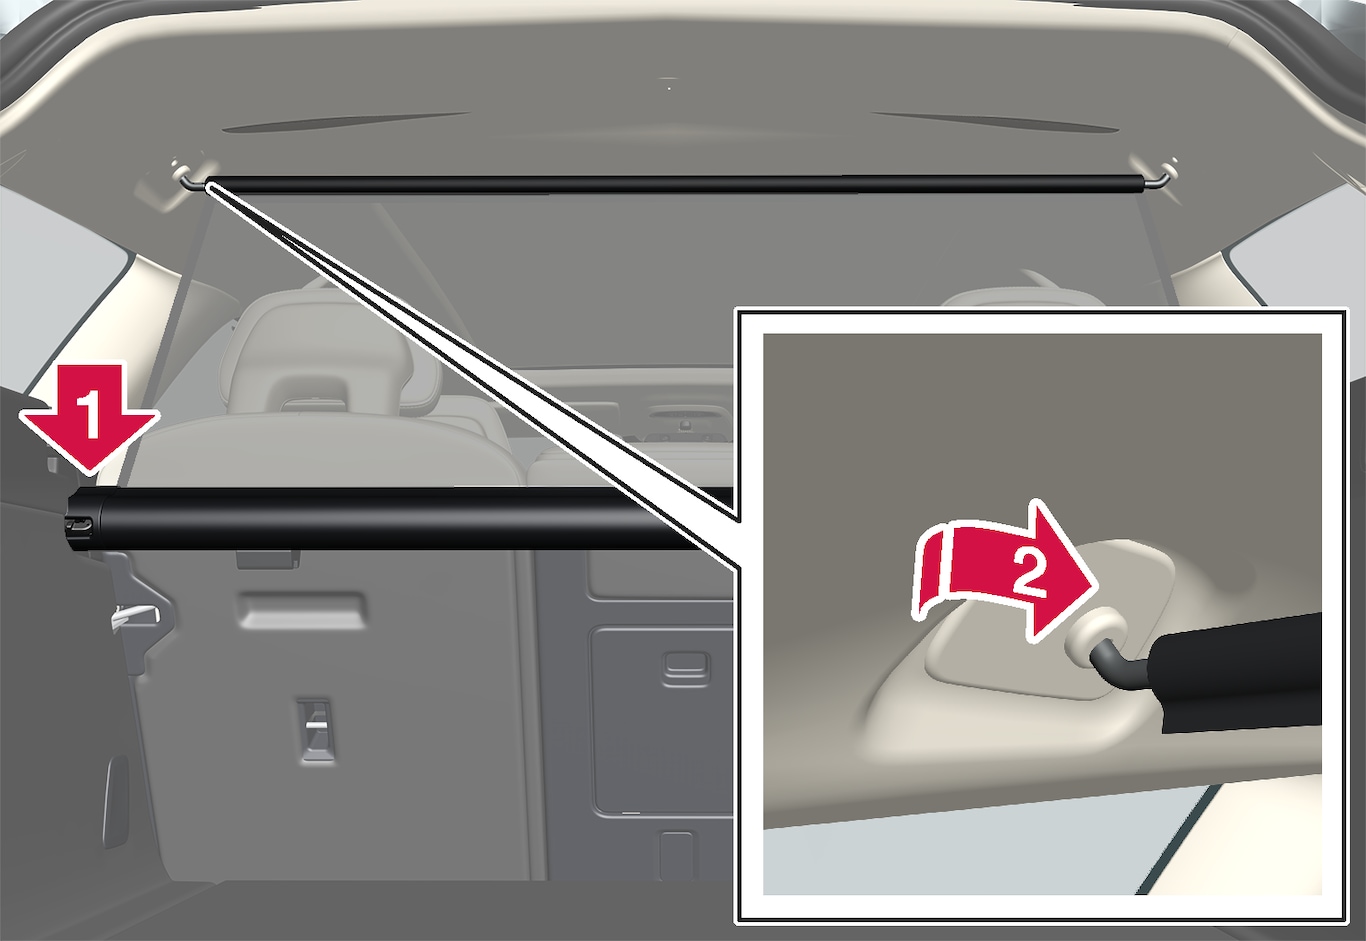
Guide the ends of the cargo net's cassette over the load anchoring eyelets in the side panel recesses. Press the ends of the cassette into place on each side. Make sure the cassette is securely in place.
Pull up the net.
Insert one of the net's upper attachments into the corresponding rear ceiling bracket and press it as far forward into the bracket as possible.
Press the other attachment into the rear ceiling bracket on the opposite side and press it as far forward into the bracket as possible.
Front mounting

Fold down the rear seat backrests.
Align the cassette's mounting rails above the mounting brackets on the backrest.
Press the cassette into the mounting brackets.
Pull up the net.
Insert one of the net's upper attachments into the corresponding front ceiling bracket and press it as far forward into the bracket as possible.
Press the other attachment into the rear ceiling bracket on the opposite side and press it as far forward into the bracket as possible.
Removing the cargo net
Remove the cargo net from the ceiling brackets by pressing the hook attachments rearward. Let the net retract into the cassette.

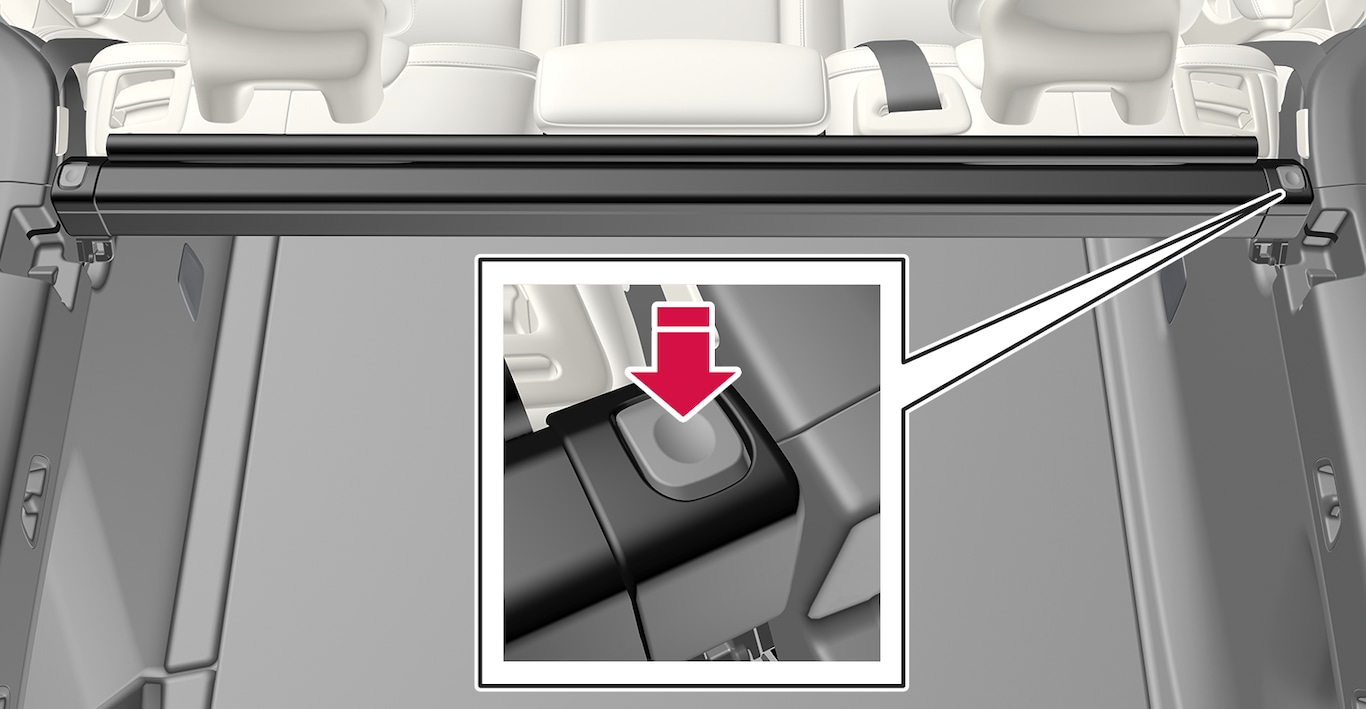
Rear mounting:
Press the button on each side of the cassette to release the ends from the load anchoring eyelets. Lift out the net.
Front mounting:
Slide the cassette off of the mounting brackets and lift then net out.