Desmontaje
Para empezar: Saque la llave de la cerradura de contacto y espere como mínimo 5 minutos antes de tocar las conexiones eléctricas. El automóvil puede necesitar este tiempo para almacenar la información necesaria en las unidades de mando.
![P3-V60H-Battery 1](https://www.volvocars.com/images/support/img0aba573f2a9c1f2ec0a801e701554417_1_--_--_VOICEpnghigh.png?imwidth=1280)
![P3-0920-Battery 2](https://www.volvocars.com/images/support/img759f750fdd82d777c0a801e701e1a9bb_1_--_--_VOICEpnghigh.png?imwidth=1280)
![P3-0920-Battery 3](https://www.volvocars.com/images/support/img71fea077dd8bff47c0a801e7013675ff_1_--_--_VOICEpnghigh.png?imwidth=1280)
![P3-0920 Battery 4](https://www.volvocars.com/images/support/imgab4a9965dd5e40e4c0a801e70090bad0_1_--_--_VOICEpnghigh.png?imwidth=1280)
![P3-0920 Battery 5](https://www.volvocars.com/images/support/imgf8e7eb80dd67d3e1c0a801e701b50363_1_--_--_VOICEpnghigh.png?imwidth=1280)
![Ikon grå fyrkant 1](https://www.volvocars.com/images/support/img98af4df0f28c1d7bc0a801e7006df1d8_1_--_--_VOICEpnghigh.png?imwidth=1280)
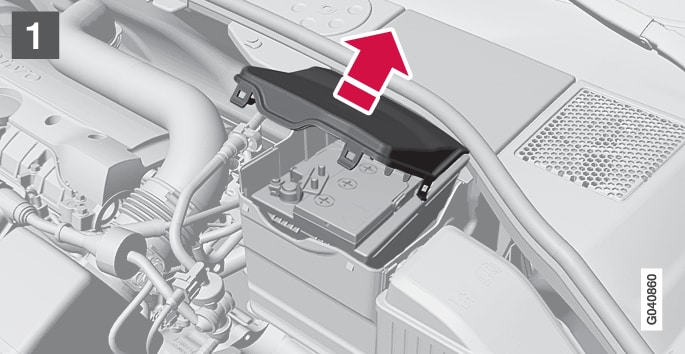
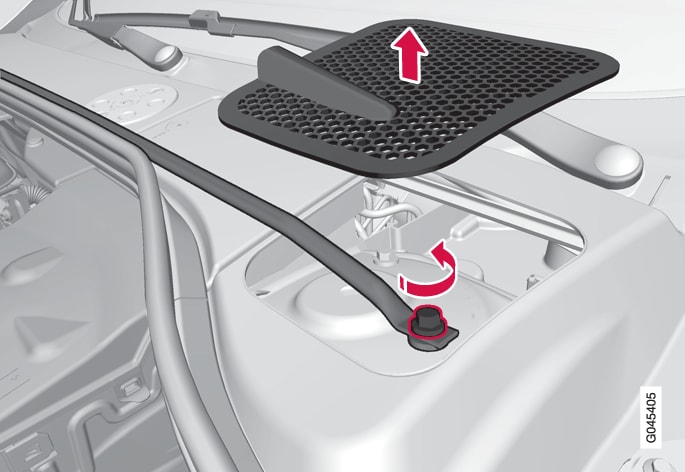
Abra los clips de la tapa de protección delantera y suelte la tapa.
![Ikon grå fyrkant 2](https://www.volvocars.com/images/support/img5b32fadc4e8e59e6c0a801e70092fcd9_1_--_--_VOICEpnghigh.png?imwidth=1280)
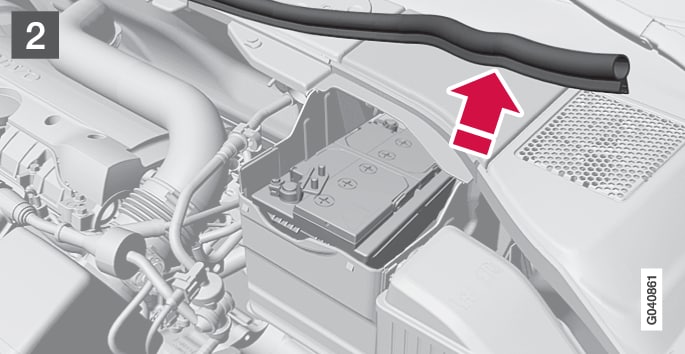
Suelte la junta de goma para liberar la tapa de protección trasera.
![Ikon grå fyrkant 3](https://www.volvocars.com/images/support/img0851ce904e978271c0a801e701189cb6_1_--_--_VOICEpnghigh.png?imwidth=1280)
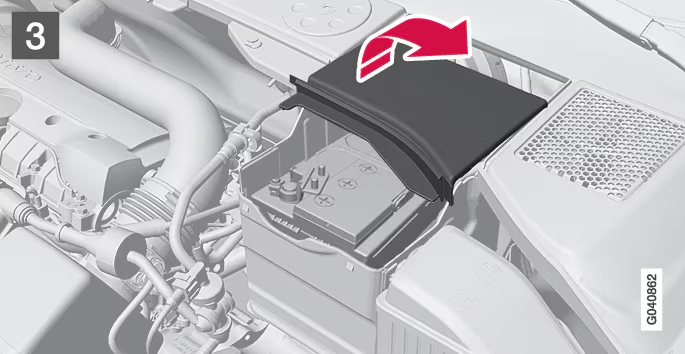
Suelte la tapa de protección trasera girando un cuarto de vuelta y sáquela.
Advertencia
![Ikon grå fyrkant 4](https://www.volvocars.com/images/support/imgb0038552bf223a75c0a801e701c6f92c_1_--_--_VOICEpnghigh.png?imwidth=1280)
![Ikon röd pil 1](https://www.volvocars.com/images/support/img541c55dff28c0cb2c0a801e7010d148d_1_--_--_VOICEpnghigh.png?imwidth=1280)
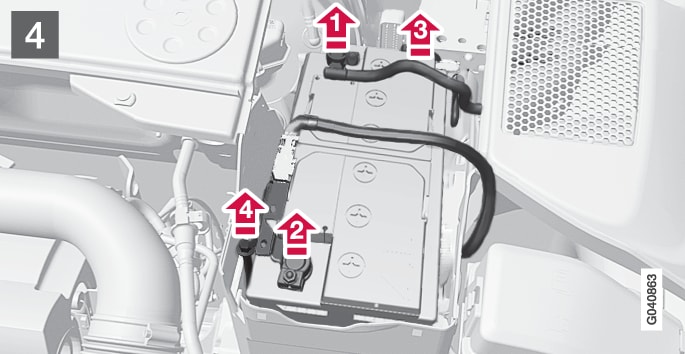
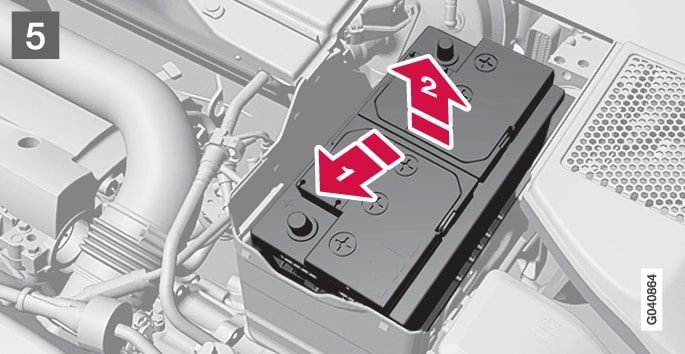
Suelte el cable negro negativo.
![Ikon röd pil 2](https://www.volvocars.com/images/support/imgc1c5c3fdf29536c4c0a801e701c08c94_1_--_--_VOICEpnghigh.png?imwidth=1280)
Suelte el cable rojo positivo.
![Ikon röd pil 3](https://www.volvocars.com/images/support/img85069ba6f64d4890c0a801e700773e60_1_--_--_VOICEpnghigh.png?imwidth=1280)
Suelte la manguera de purga de la batería.
![Ikon röd pil 4](https://www.volvocars.com/images/support/img1306d68106ee4c22c0a801e70132159c_1_--_--_VOICEpnghigh.png?imwidth=1280)
Destornille el tornillo que sujeta la abrazadera de la batería.
![Ikon grå fyrkant 5](https://www.volvocars.com/images/support/imgc10c7d99bf222315c0a801e700828b11_1_--_--_VOICEpnghigh.png?imwidth=1280)
![Ikon röd pil 1](https://www.volvocars.com/images/support/img541c55dff28c0cb2c0a801e7010d148d_1_--_--_VOICEpnghigh.png?imwidth=1280)
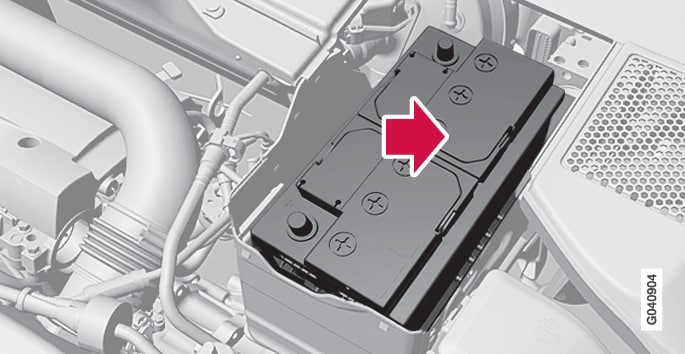
Desplace la batería a un lado.
![Ikon röd pil 2](https://www.volvocars.com/images/support/imgc1c5c3fdf29536c4c0a801e701c08c94_1_--_--_VOICEpnghigh.png?imwidth=1280)
Levántela.
Barra transversal en el R-Design*
![P3-1120-S60/V60 Tvärstag R-design](https://www.volvocars.com/images/support/img9cb7af75ed51e6cec0a801e701c34631_1_--_--_VOICEpnghigh.png?imwidth=1280)
Los automóviles con R-Design cuentan con una barra transversal que debe desmontarse para cambiar la batería de arranque.
- La barra transversal se monta con el mismo procedimiento en sentido inverso.
Nota
Montaje
![P3-0920 Battery assemble](https://www.volvocars.com/images/support/img53960316dd678275c0a801e70036a1d0_1_--_--_VOICEpnghigh.png?imwidth=1280)
Para más información sobre la batería de arranque del automóvil, véase Batería de arranque - generalidades y Arranque con pinzas.