참고
- 정보 심벌이 켜지고 차량 키 배터리 부족이라는 메시지가 운전자 화면에 표시될 경우
- 잠금 장치가 차량에서 20 m(65 ft) 이내의 거리에서 리모컨의 신호에 반응하지 않을 경우.
참고
버튼 없는 키1(Key Tag)의 배터리는 교체할 수 없습니다 - 볼보 서비스 센터에 새 키를 주문할 수 있습니다.
중요
키 열기 및 배터리 교체하기
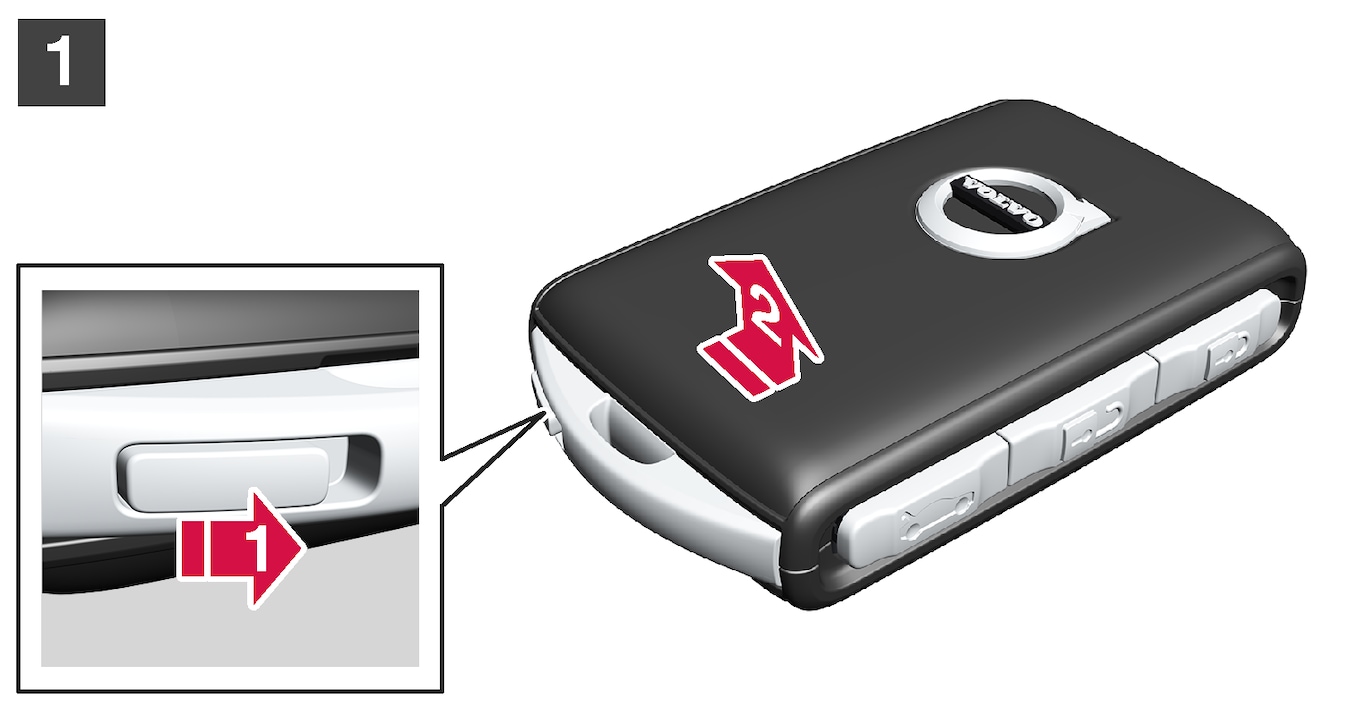

 리모컨을 전방이 보이고 볼보 로고가 올바른 쪽으로 향하게 잡습니다. 키 링 옆의 하단 변부 버튼을 우측으로 밉니다. 앞쪽의 셸을 위쪽으로 몇 밀리미터 밉니다.
 그러면 셸이 빠져나오고 키를 들어올려 뺄 수 있습니다.


키를 돌리고 버튼을 측면으로 이동시킨 다음 뒤쪽 쉘을 위로 몇 밀리미터 미십시오.
그러면 셸이 빠져나오고 키를 들어올려 뺄 수 있습니다.
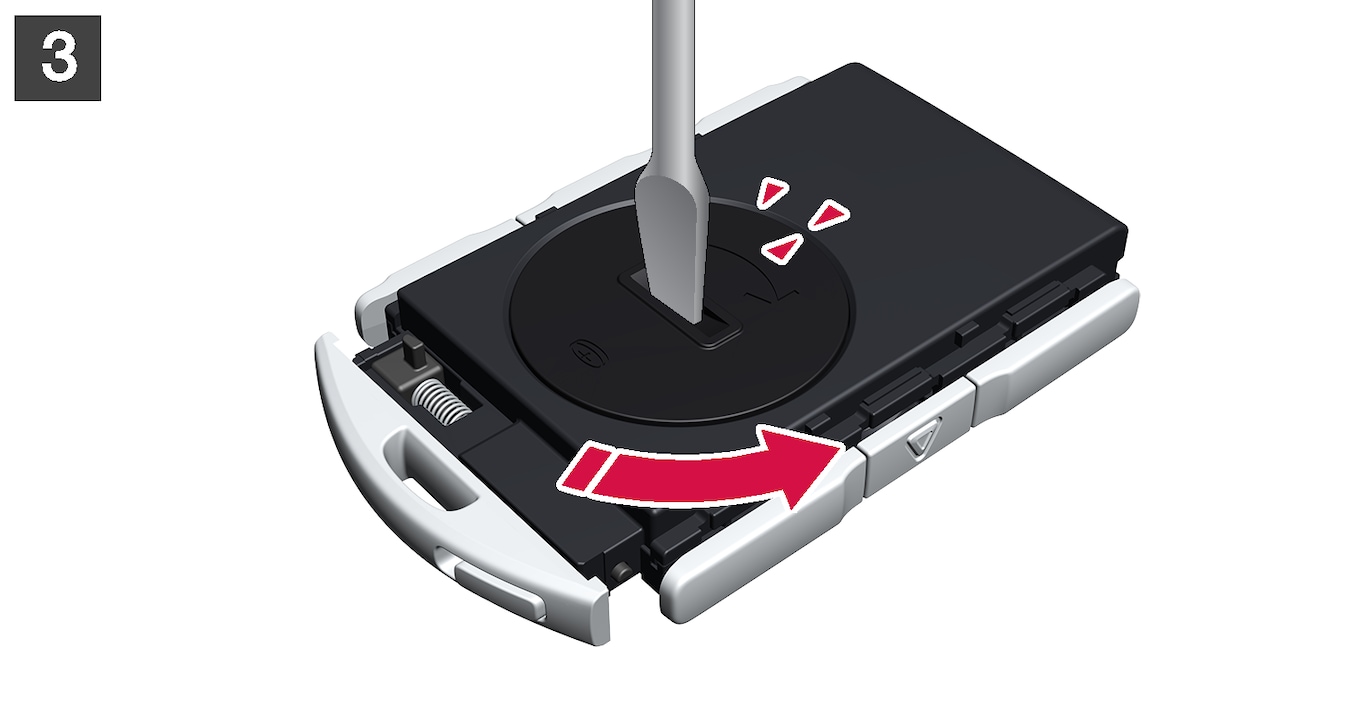

스크루드라이버 등을 사용하여 배터리 커버를 시계 반대 방향으로 돌려 표시가 OPEN 문자와 정렬되게 합니다.
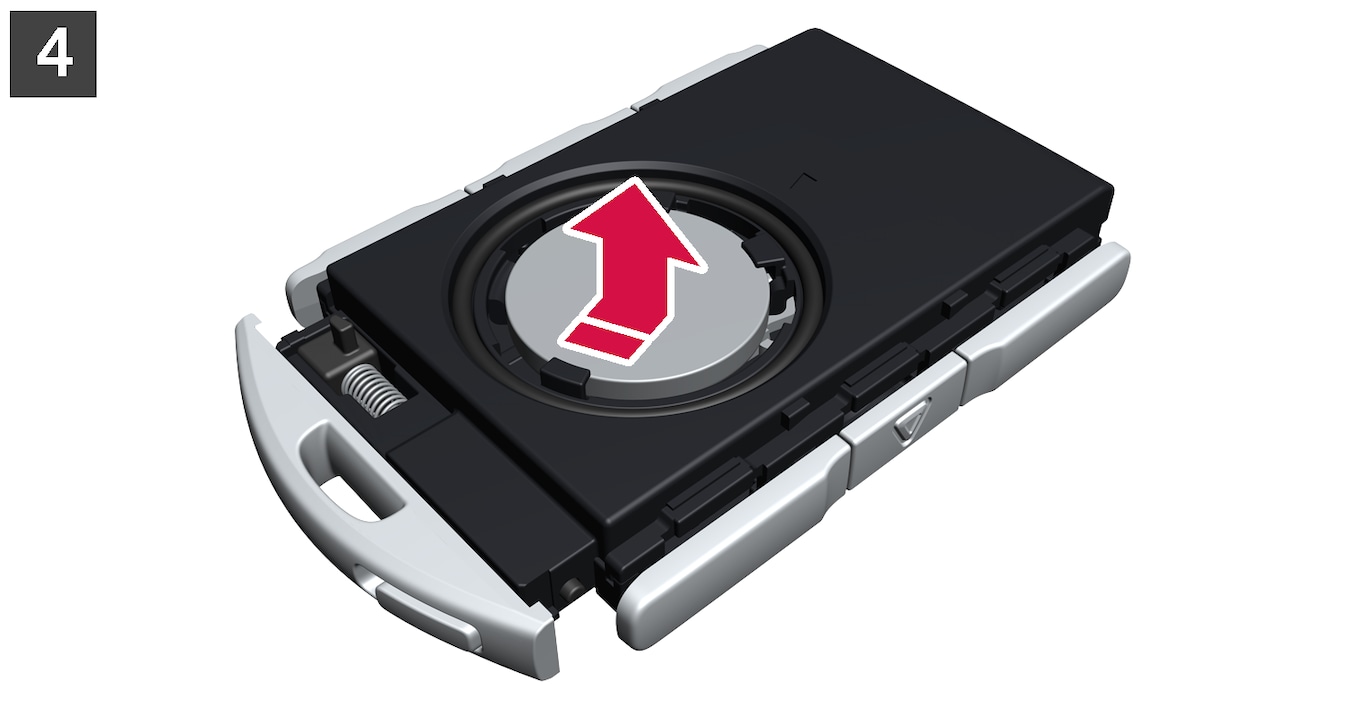
손톱으로 움푹 패인 부분을 눌러 배터리 커버를 주의하여 들어올립니다.
그런 다음 배터리 커버를 위로 비집어 엽니다.

배터리 + 쪽은 위를 향하고 있습니다. 그런 다음 배터리를 그림과 같이 주의하여 비집어 엽니다.
중요
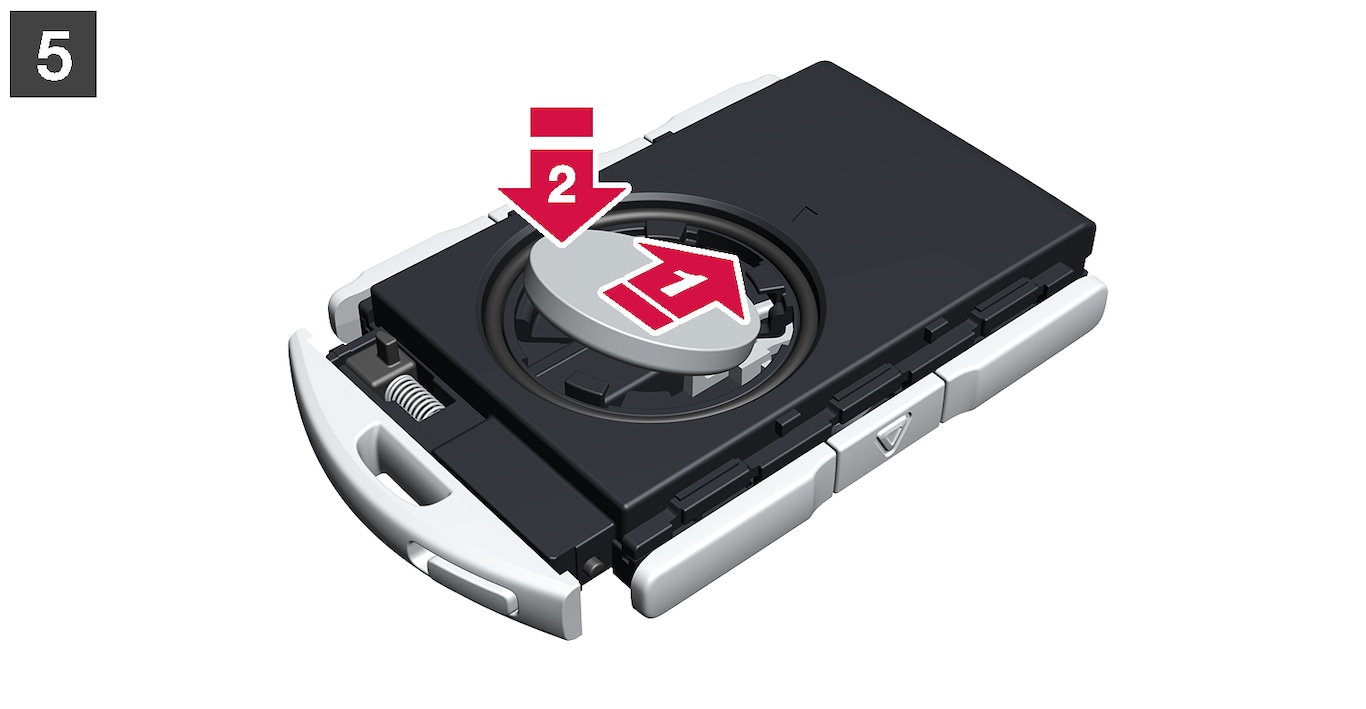

새 배터리를 (+) 쪽을 위로 오게 하여 장착합니다. 리모컨의 배터리 접점을 손가락으로 만지지 마십시오.
배터리를 가장자리를 아래쪽으로 오게 하여 홀더에 넣습니다. 그런 다음 배터리를 앞으로 밀어 두 개의 플라스틱 캐치에 고정합니다.
배터리를 눌러 위쪽 검은색 플라스틱 캐치 아래에 고정합니다.
참고
참고
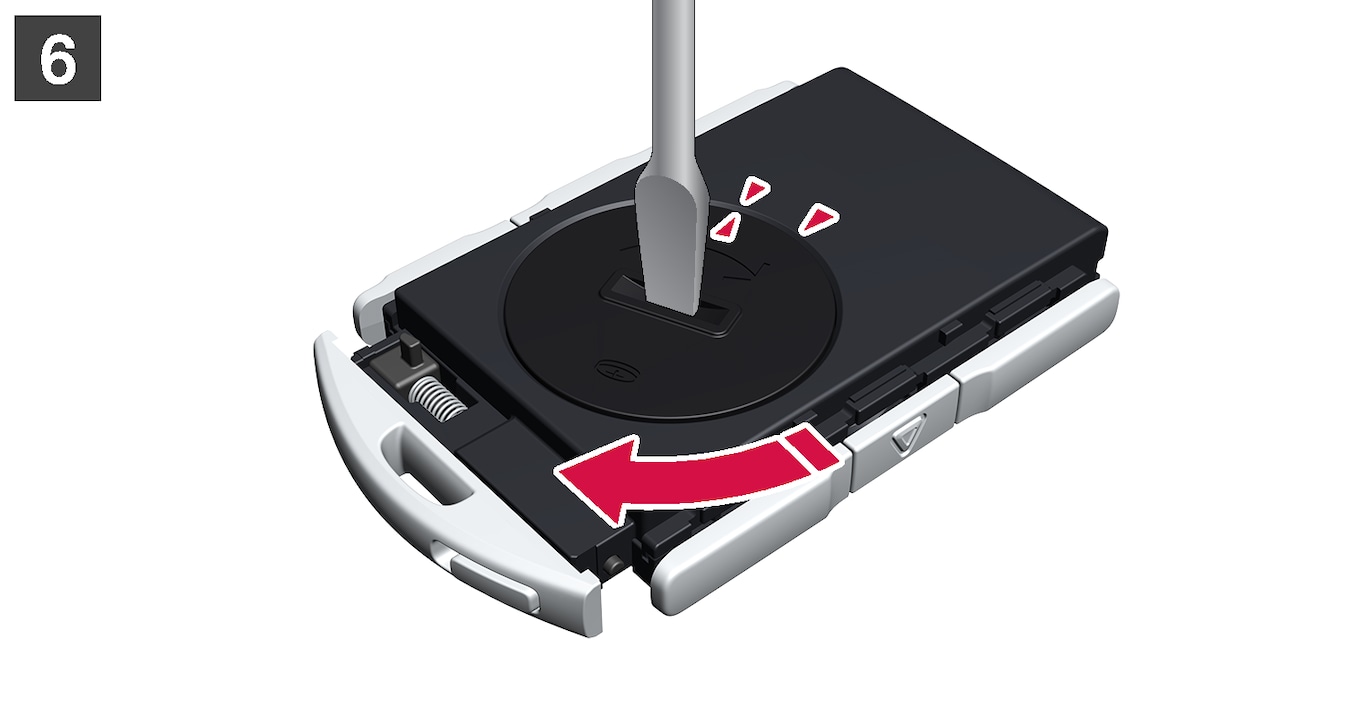

배터리 커버를 다시 끼운 후 시계 방향으로 돌려 표시가 CLOSE 문자와 정렬되게 합니다.
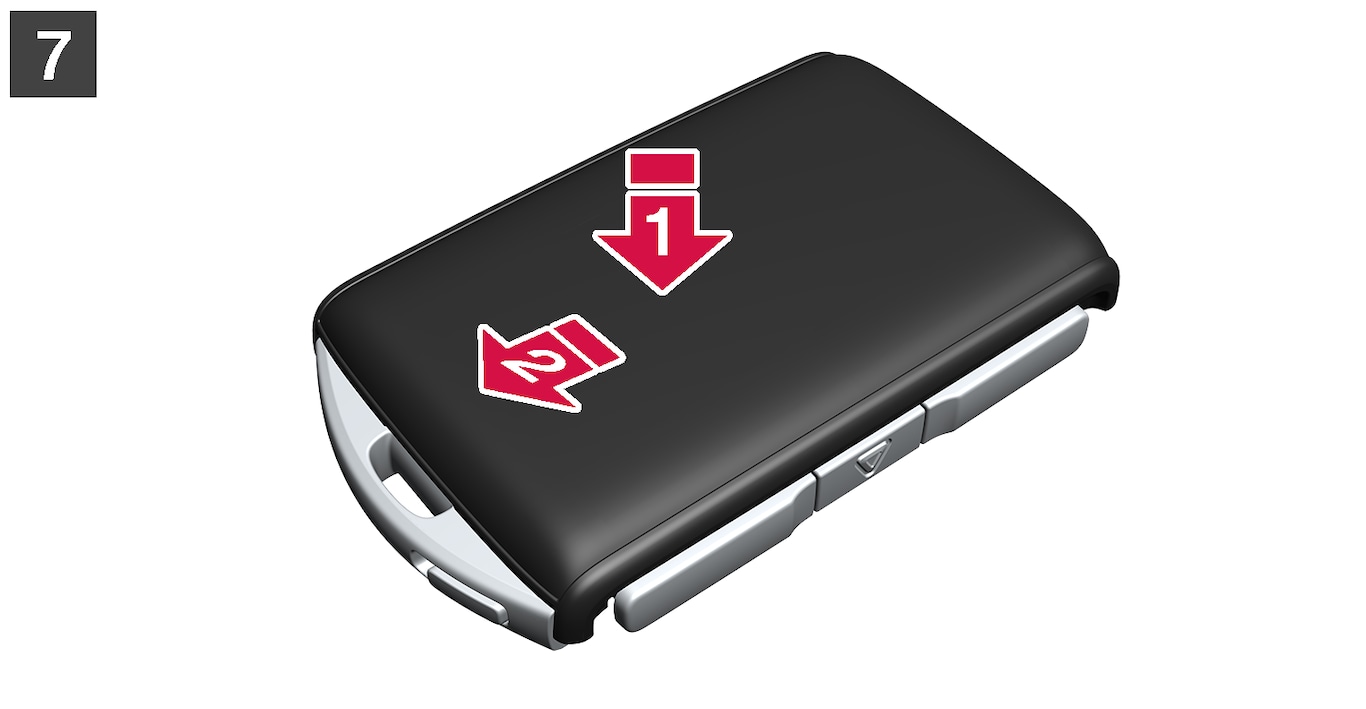

뒤쪽 쉘을 원위치로 되돌린 후 딸깍 소리가 날 때까지 누릅니다.
그런 다음 셸을 뒤로 밉니다.
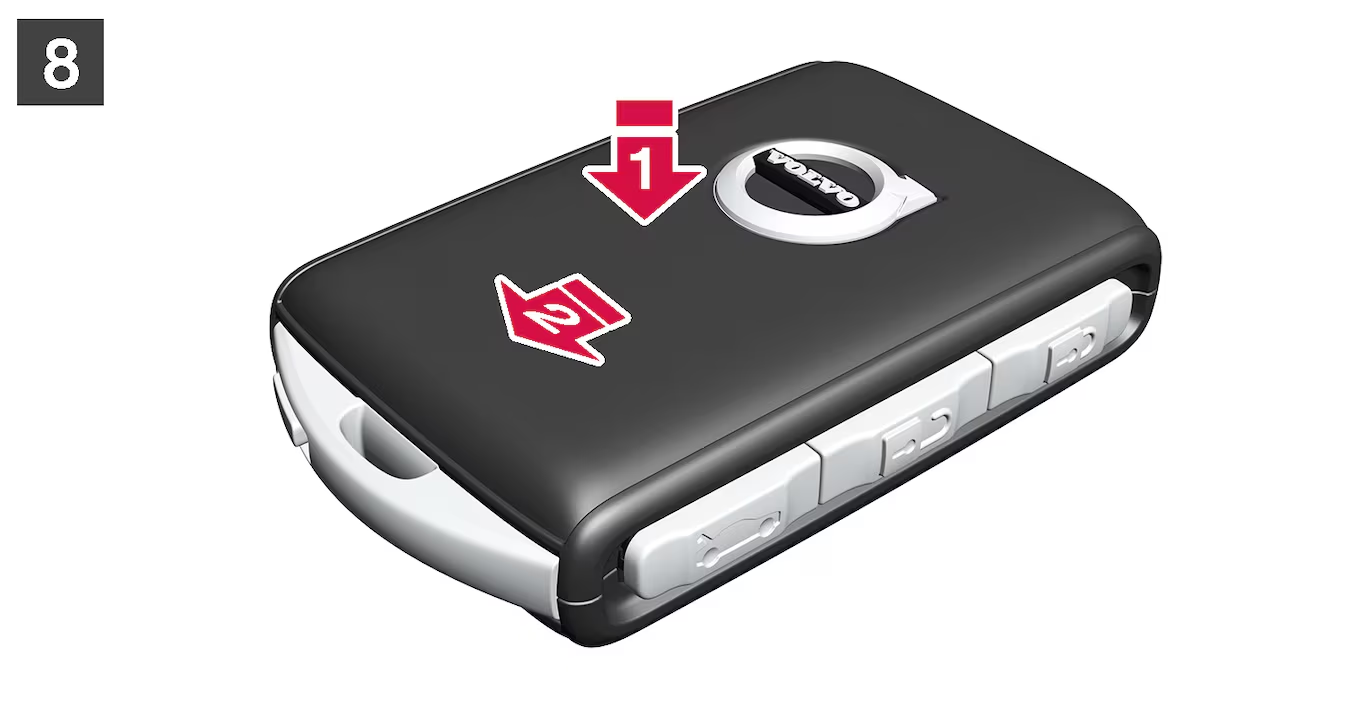

리모컨을 위아래를 뒤집어 앞쪽 쉘을 딸깍 소리가 날 때까지 눌러 다시 끼웁니다.
그런 다음 셸을 뒤로 밉니다.