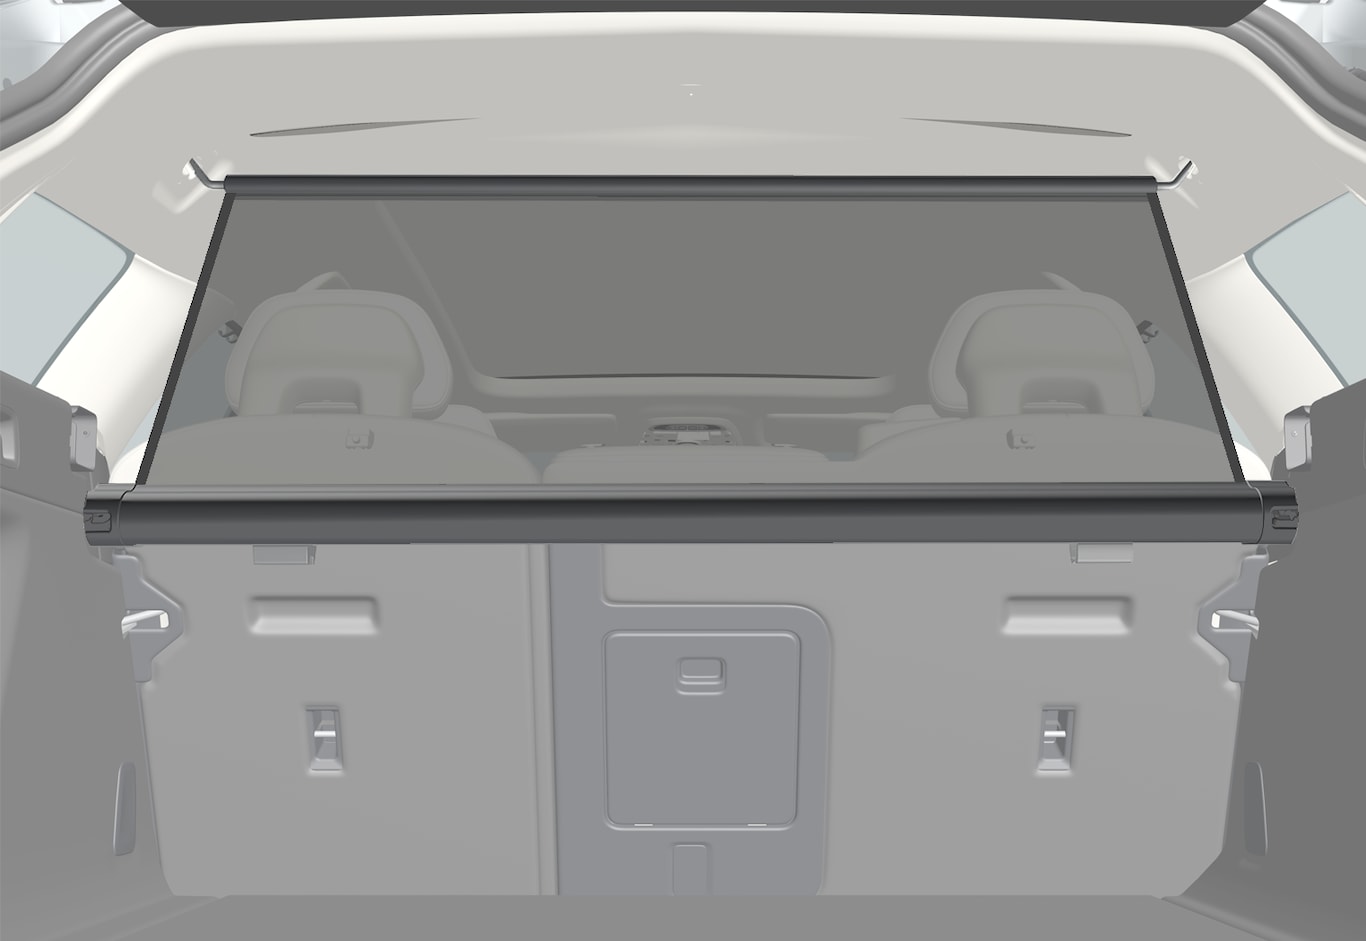
The safety net is fitted into four mounting points.

For reasons of safety, the safety net must always be fastened and anchored as described below.
The net is made of a strong nylon fabric and can be secured two different locations in the car:
- Rear fitting - behind the rear seat.
- Front fitting - behind the front seats.
Warning
Loads in the luggage compartment must be anchored well, and also using a correctly fitted safety net.
Fitting the safety net
Rear fitting

If necessary, fold the rear seat backrests forward in order to facilitate installation.
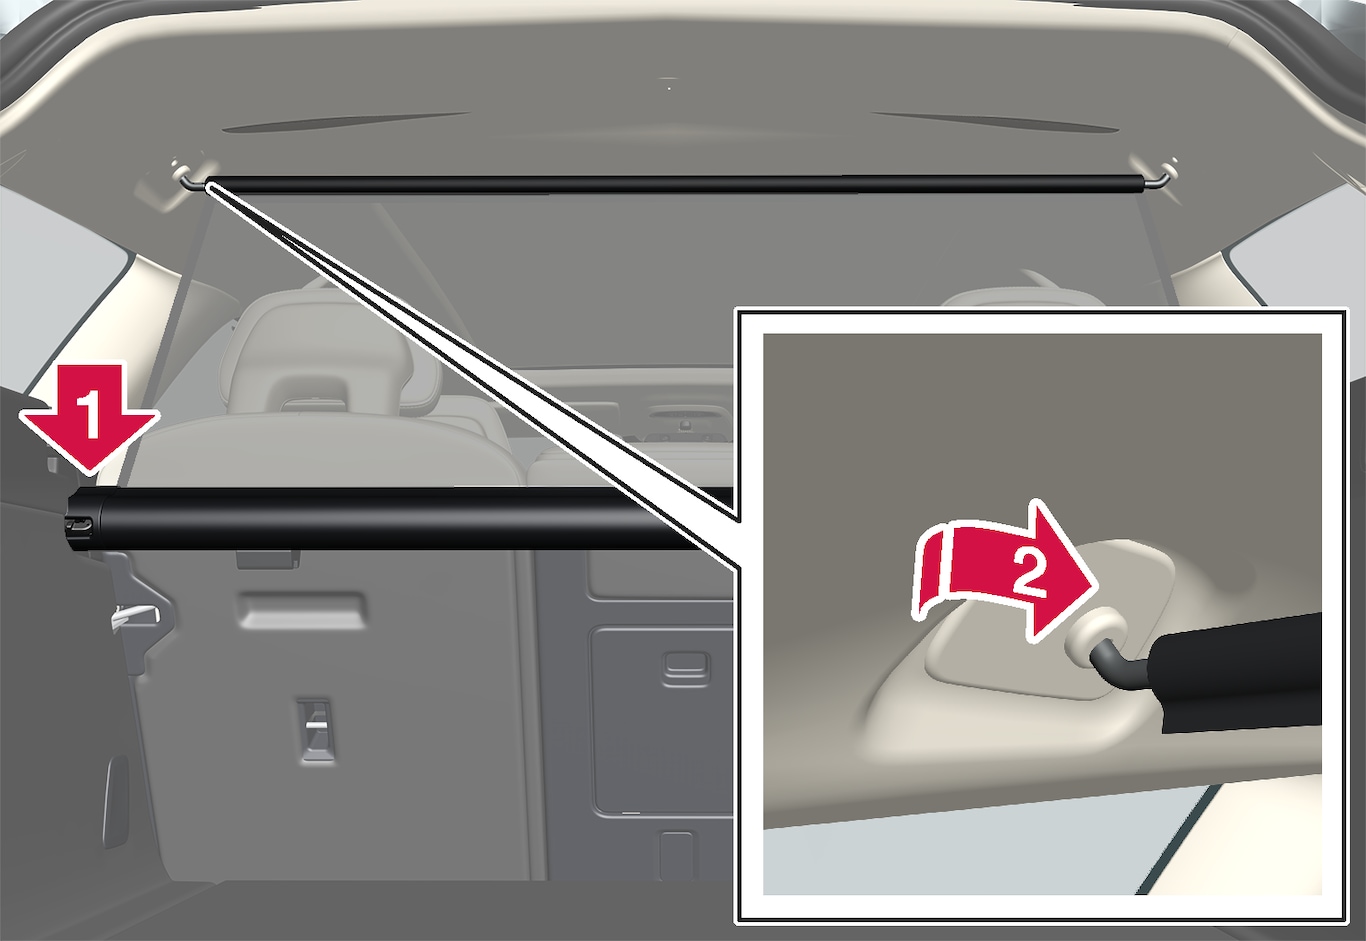
Lower the safety net cassette's end pieces over the mounting eyelets in the recess of the side panels. Press down the end piece one side at a time. Check that the cassette is properly secured.
Pull up the net.
Hook one of the safety net's retaining hooks into the rear roof mounting and then press it forward to the end position.
Hook the other of the safety net's retaining hooks on the opposite side and press it forward to the end position.
Front fitting

Fold the rear seat's backrest forward.
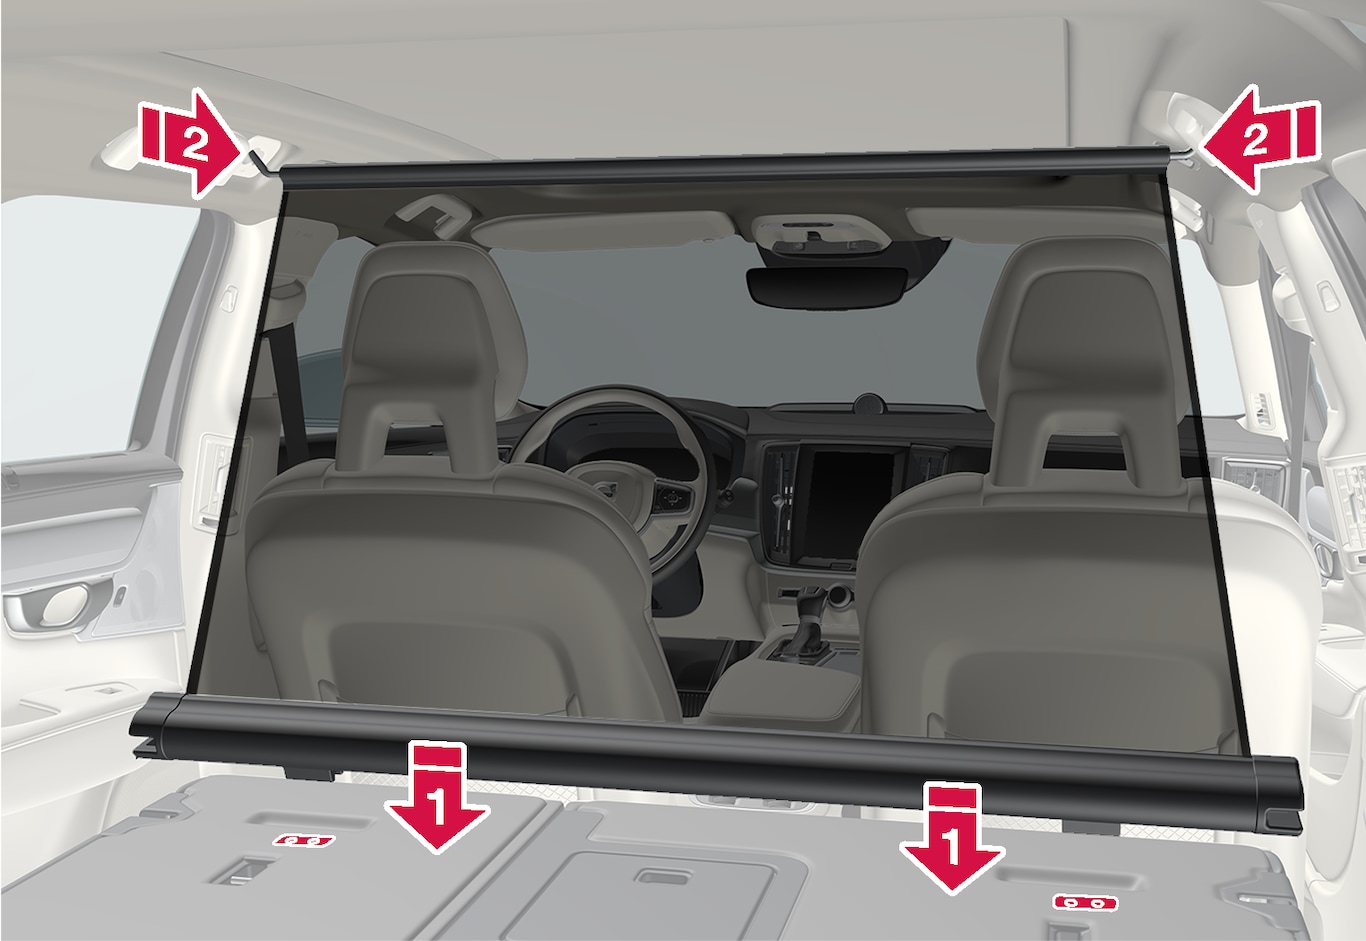
Align the safety net cassette's anchor rails in front of the backrest's attachment lugs.
Slide the cassette into the attachment lugs.
Pull up the net.
Hook one of the safety net's retaining hooks into the front roof mounting and then press it forward to the end position.
Hook the other of the safety net's retaining hooks on the opposite side and press it forward to the end position.
Removing the safety net
Undo the safety net from the roof mountings by pressing the retaining hooks backwards. Allow the net to roll into the cassette.

Rear fitting:
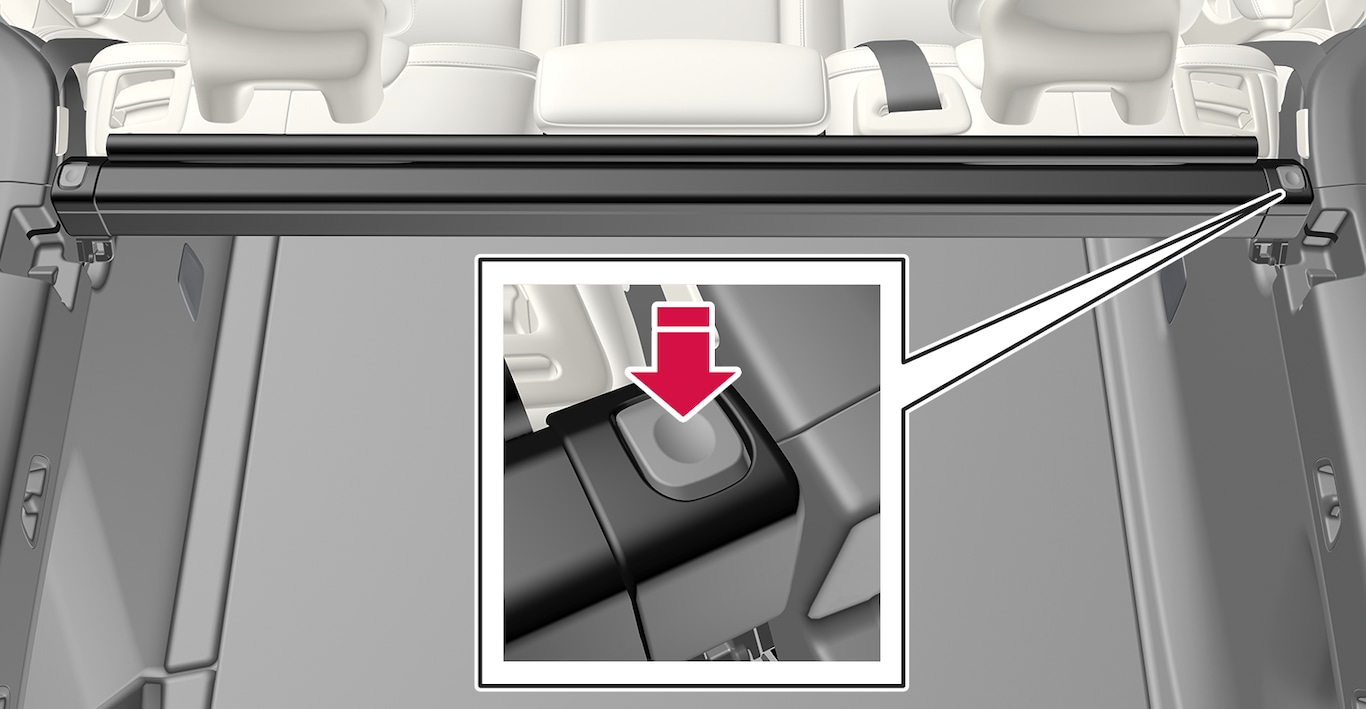
Press the button on each side of the cassette in order to release the end pieces from the mounting eyelets. Lift out the safety net.
Front fitting:
Slide the cassette from the attachment lugs and lift out the safety net.