更換雨刷片,後窗
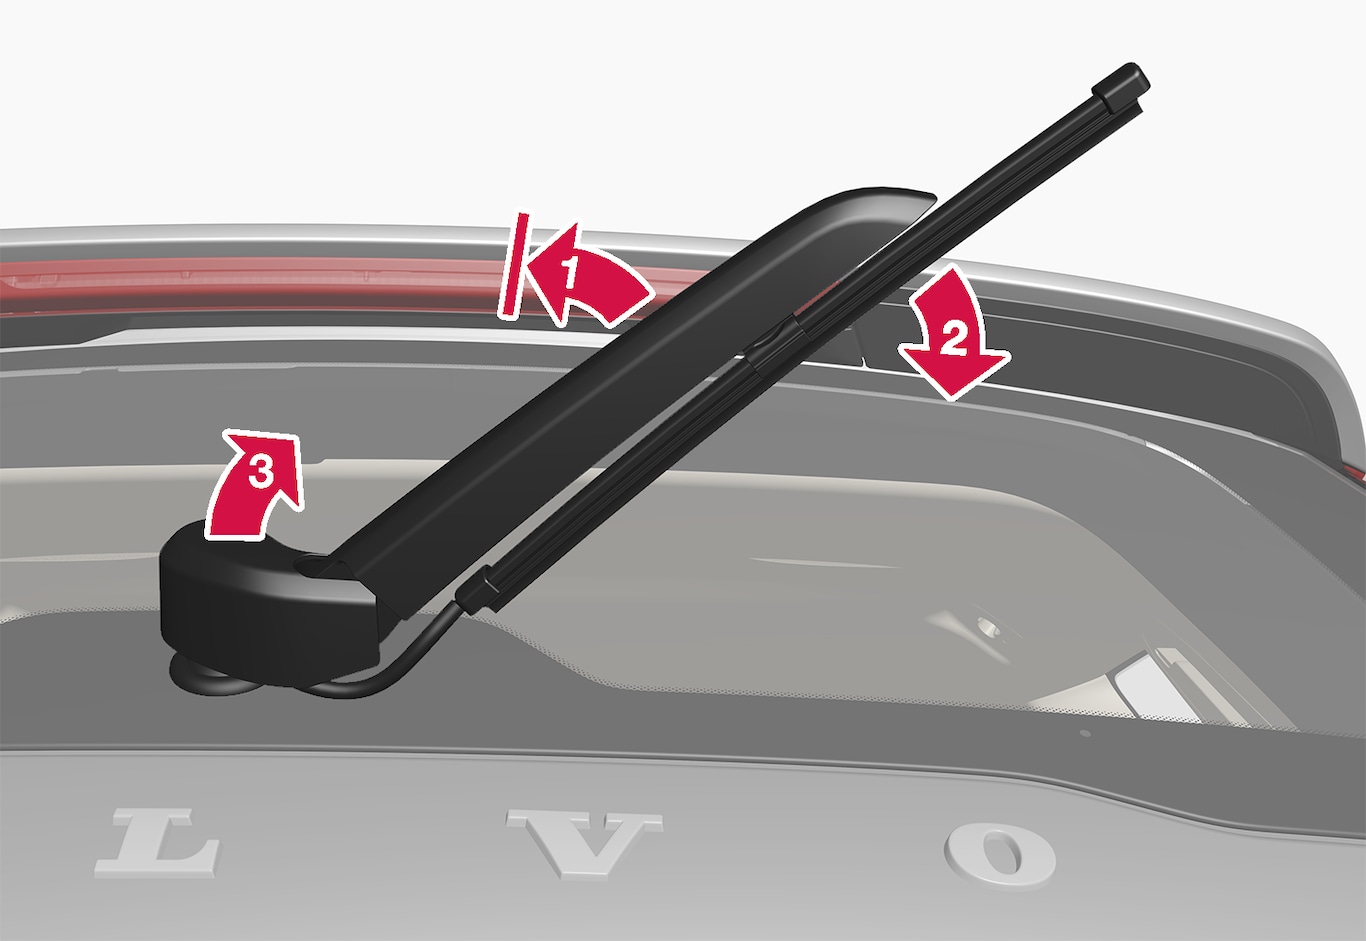

抓住雨刷臂中間,並將之從擋風玻璃抬起到鎖定位置。
注意
在半延伸角處有一個可以感覺到阻力的鎖定位置,這個鎖定位置可防止手臂撞到擋風玻璃。雨刷臂必須拉過鎖定位置,才能更換雨刷片。

抓住雨刷片中央托架上方,向右下方拉,直到雨刷片從雨刷臂上鬆動為止。

抬起雨刷臂托架罩。請注意,不要讓雨刷臂掉落到擋風玻璃上。
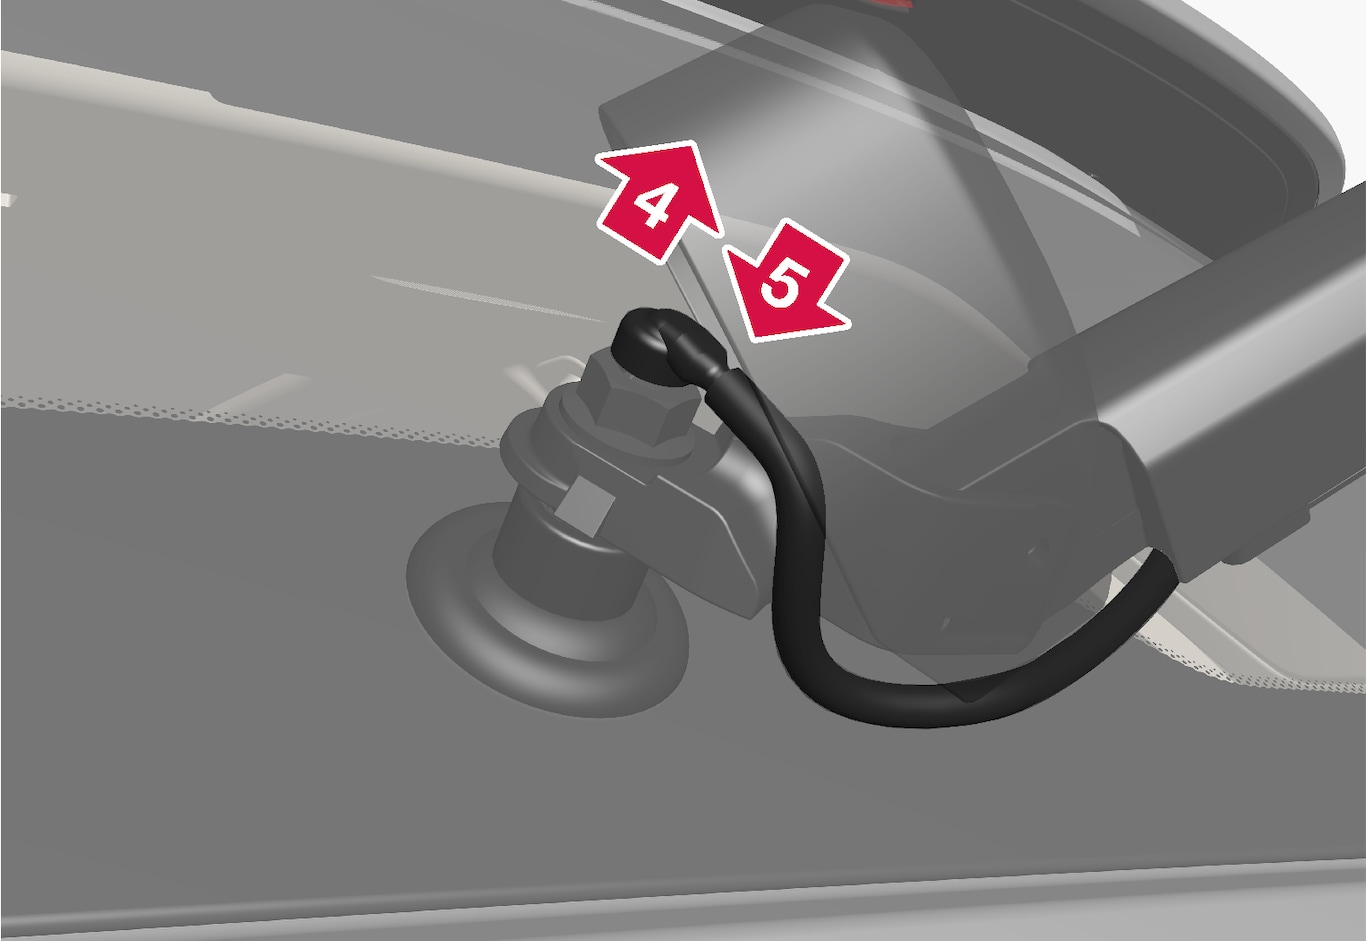

鬆開托架上的清洗器軟管。

將新的清洗器軟管與雨刷片裝入托架。摺下雨刷臂托架罩。
注意
務必按照圖示路徑設置軟管。否則再次降下時可能會被外殼夾住。
將新的雨刷片按壓定位。完成時應會聽到喀啦一聲。檢查確認雨刷片牢固安裝。
放下雨刷臂。
重要
檢查確認雨刷片正常。輕忽保養會縮短雨刷片的使用壽命。