拆卸
首先:將遙控鑰匙自點火開關取出,並在接觸任何電氣連接點前等待至少 5 分鐘 - 因為汽車的電氣系統需要將必要資訊儲存到控制模組中。
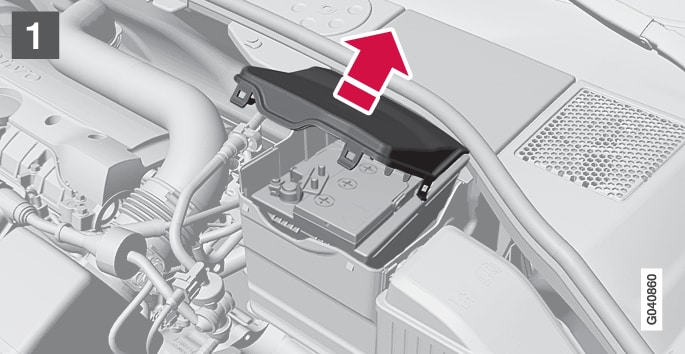

扳起電瓶上蓋的固定扣並取下上蓋。

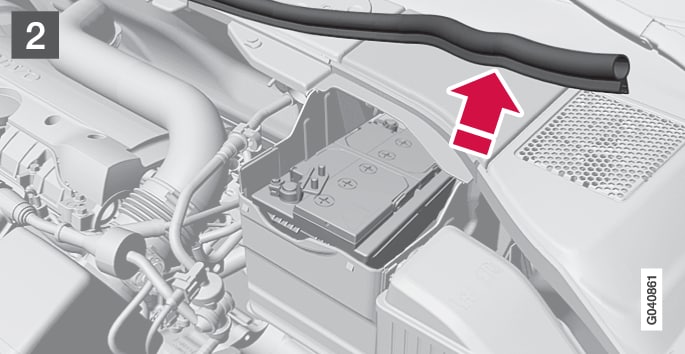
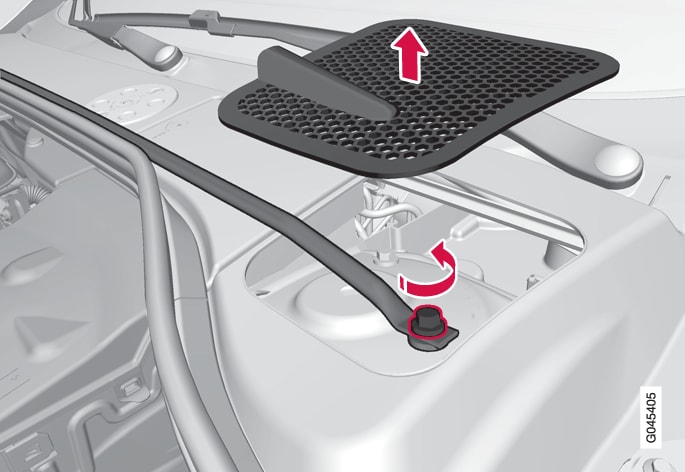
移開橡膠飾條使後蓋不受束縛。

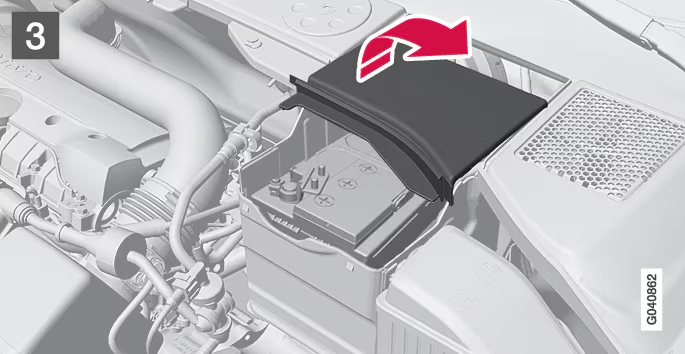
轉動四分之一圈並將其提起取下,即可拆除後蓋。
警告
請以正確順序連接及拆卸正極與負極纜線。


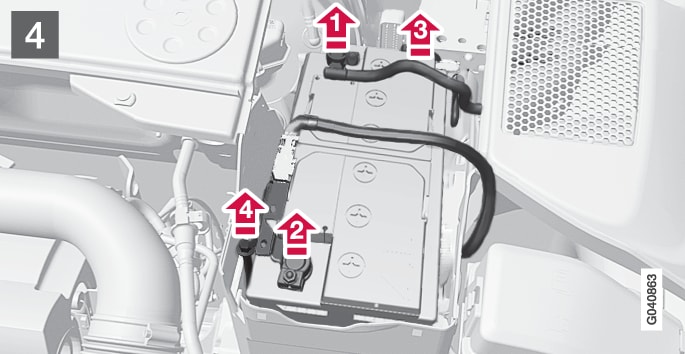
拆下黑色負極導線。

拆下紅色正極導線。

從電瓶上拆下通風軟管。

將電瓶固定夾的螺絲鬆開

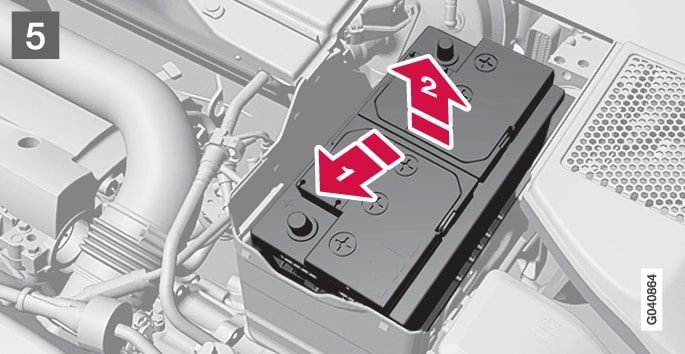
將電瓶移到旁邊。
將其舉起。
R-Design*上的交叉支撐條
採用R-Design的汽車有一根交叉支撐條必須在更換主電瓶前拆下。
拆下左右兩側的實心廂室蓋。以塑膠刀或類似工具小心地撬起。
鬆開並拆下固定交叉支撐條的螺絲(右側有一根,左側有一根)。
拆下交叉支撐條。
現在可依前節的說明拆下主電瓶。
- 請以相反順序安裝交叉支撐條。
注意
將螺絲旋緊到 30 Nm。以扭力扳手檢查扭力。
安裝
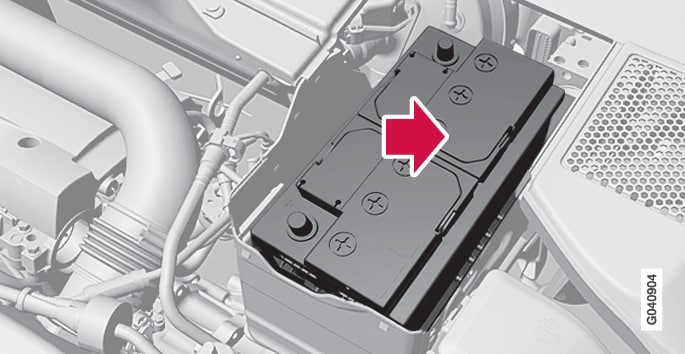
將電瓶放進電瓶箱內。
將電瓶向內與向旁邊移動直到它到達箱子末端邊緣。
將支撐電瓶的夾子夾緊。
連接通風軟管。
檢查軟管是否正確地連接到電瓶及車內的出口。
連接紅色正極線。
連接黑色負極線。
壓下後蓋(請參閱先前的「拆卸」節次)。
安裝橡膠飾條(請參閱「拆卸」)。
對齊前蓋,並以夾子將其固定(請參閱「拆卸」)。
如需與汽車發動電瓶有關的進一步資訊,請參閱起動電瓶 - 一般資訊及使用電瓶跨接啟動。