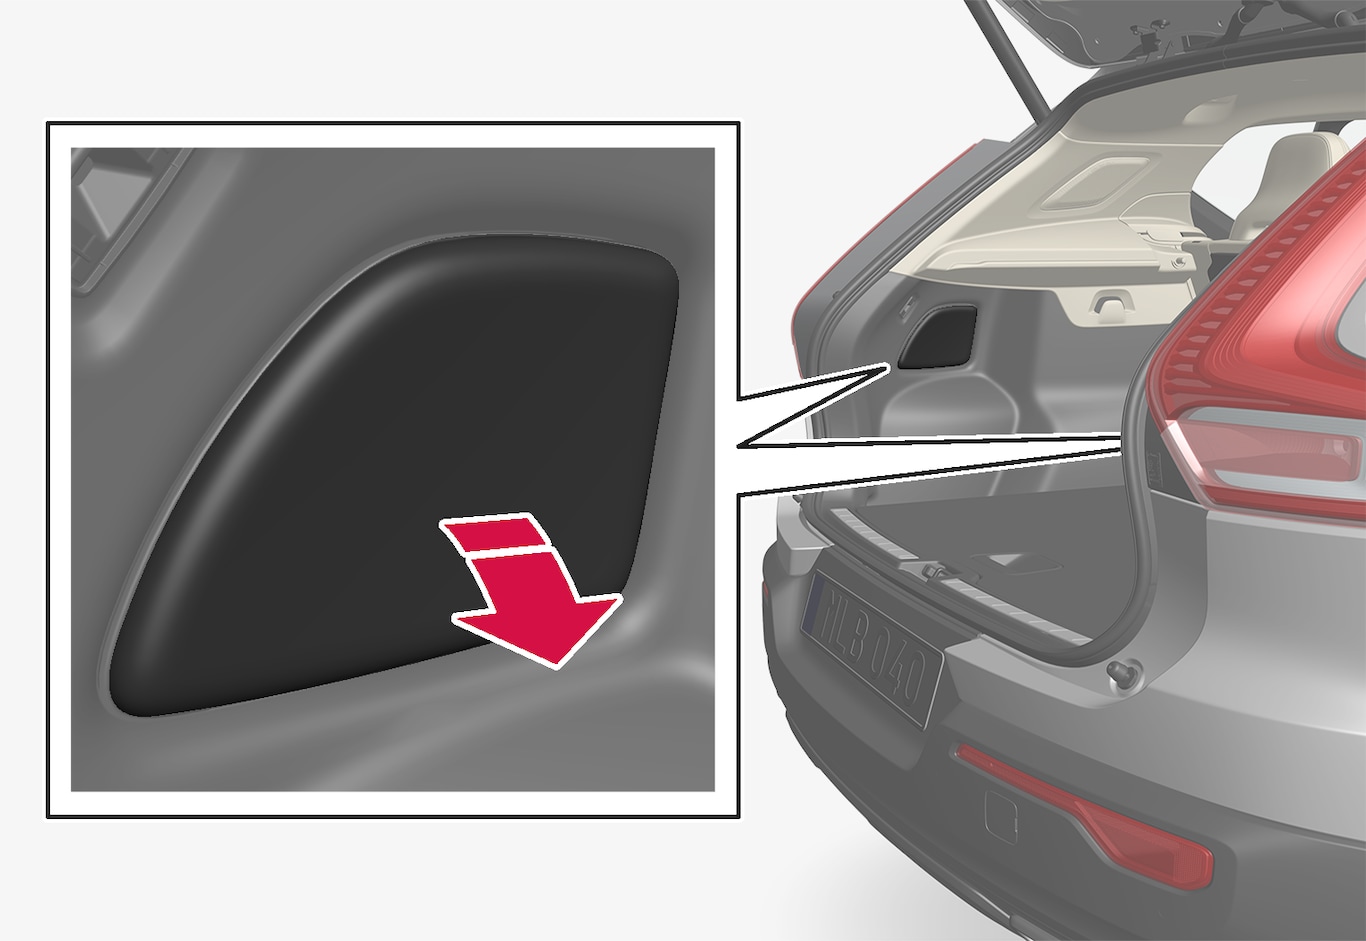
Press in the panel hatch at the upper edge to detach it.
Move the insulation aside to access the supporting bridge.

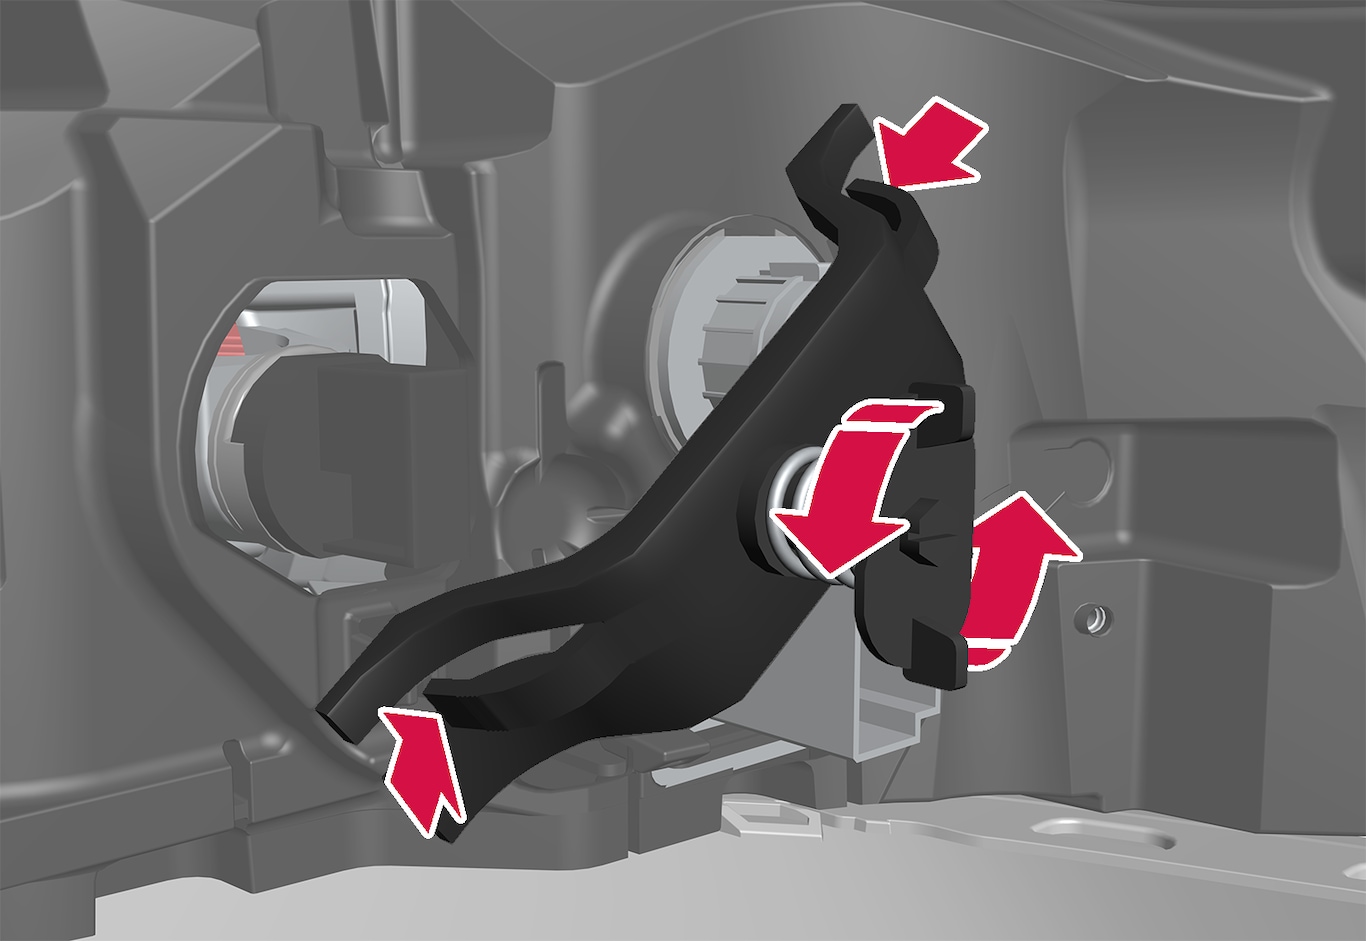
Unscrew and remove the spring bolt anticlockwise, press the clips into the sides and remove the supporting bridge. It is easiest to allow the screw to remain in the supporting bridge.
Undo the grey bulb holder by turning it anticlockwise and pulling it out.
Remove the bulb by pressing it in and turning anticlockwise.
Fit a new bulb by pressing it in and turning it clockwise.
Attach the bulb holder by turning it clockwise.
Fit the supporting bridge with associated spring bolt and make sure that the clips align in the correct position. Tighten the spring bolt until it stops, max. 2 Nm (1.5 ft lbs).
Move back the insulation and then hook in the panel and press it back into place.
Important
Never touch the glass part of the bulbs with your fingers. Grease from your fingers is vaporised by the heat, coating the reflector and then causing damage.
Note
Outside lighting such as headlamps and rear lamps may temporarily have condensation on the inside of the lens. This is normal and all exterior lighting is designed to withstand this. Condensation is normally vented out of the lamp housing when the lamp has been switched on for a time.